Here you can get full knowledge of creating a new Azure tenant for installing Dynamics 365 cloud applications like Business Central, F&O and etc. Please follow the below steps.
Create a new Azure tenant
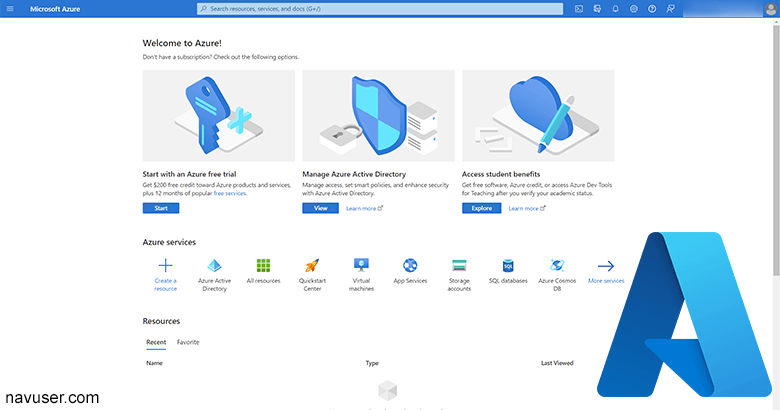
- Log into the Azure portal.
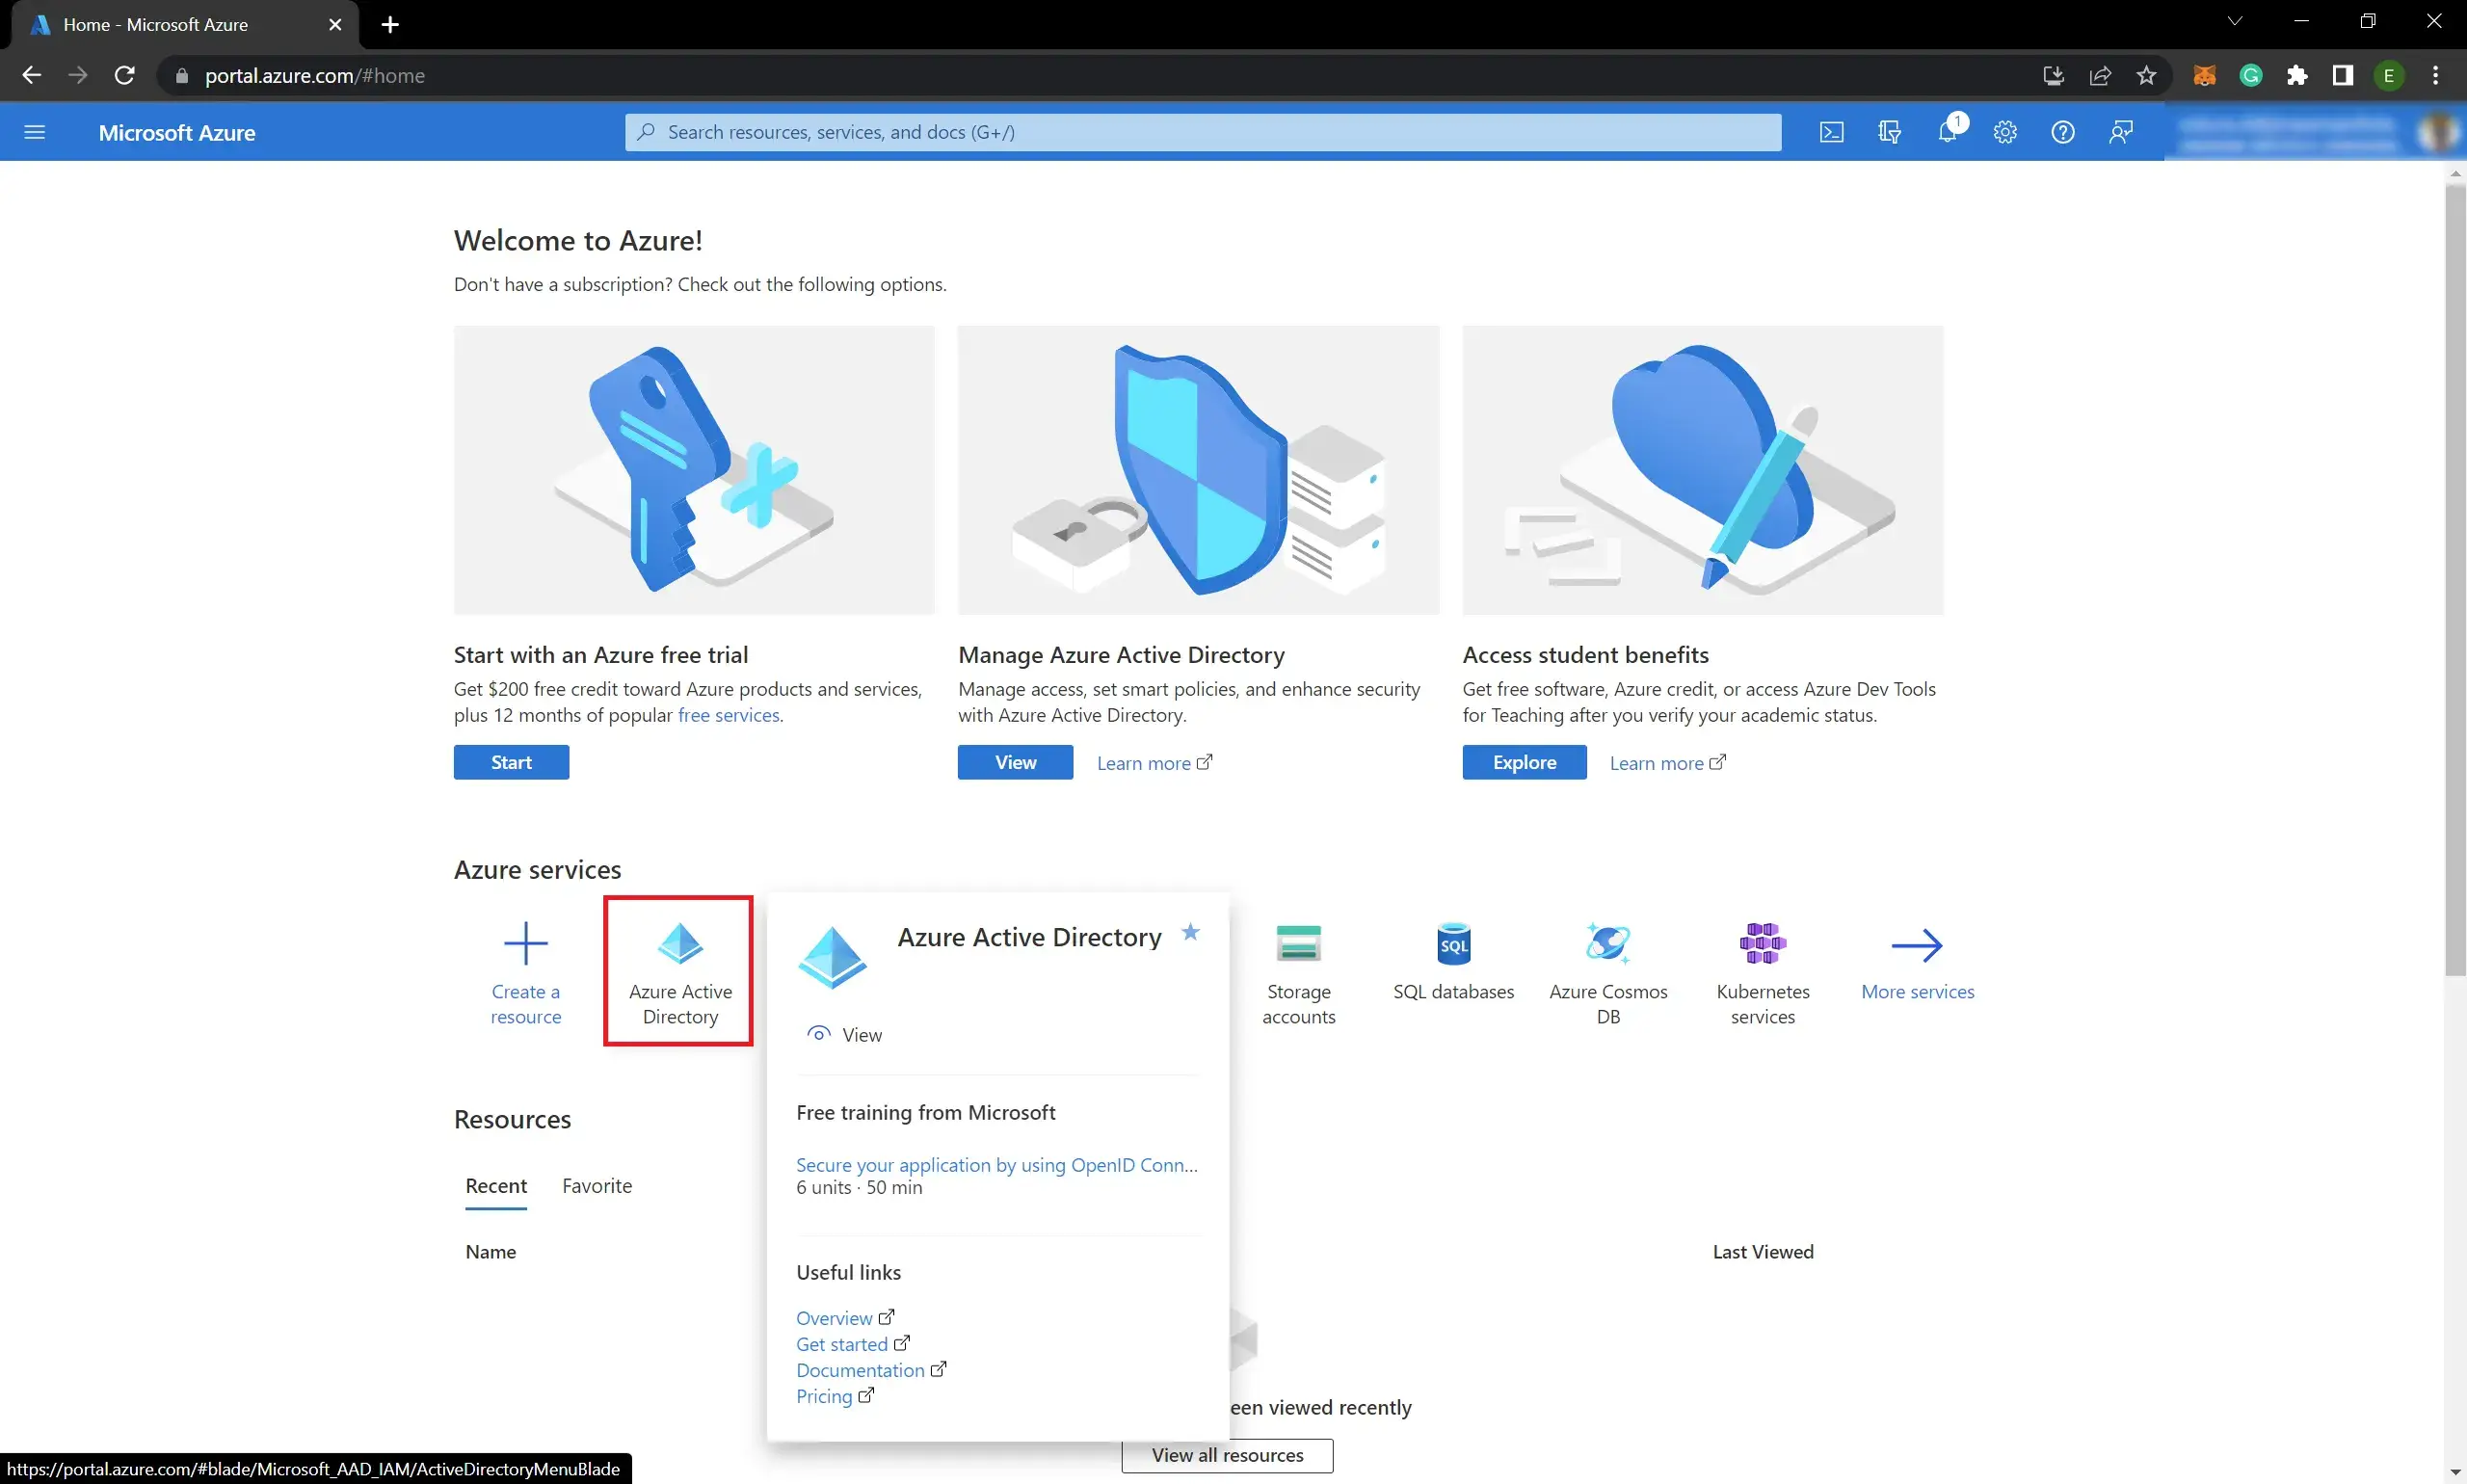
- Click Azure Active Directory under the Azure services (Or you can search as Azure Active Directory on the search field and then you can select):
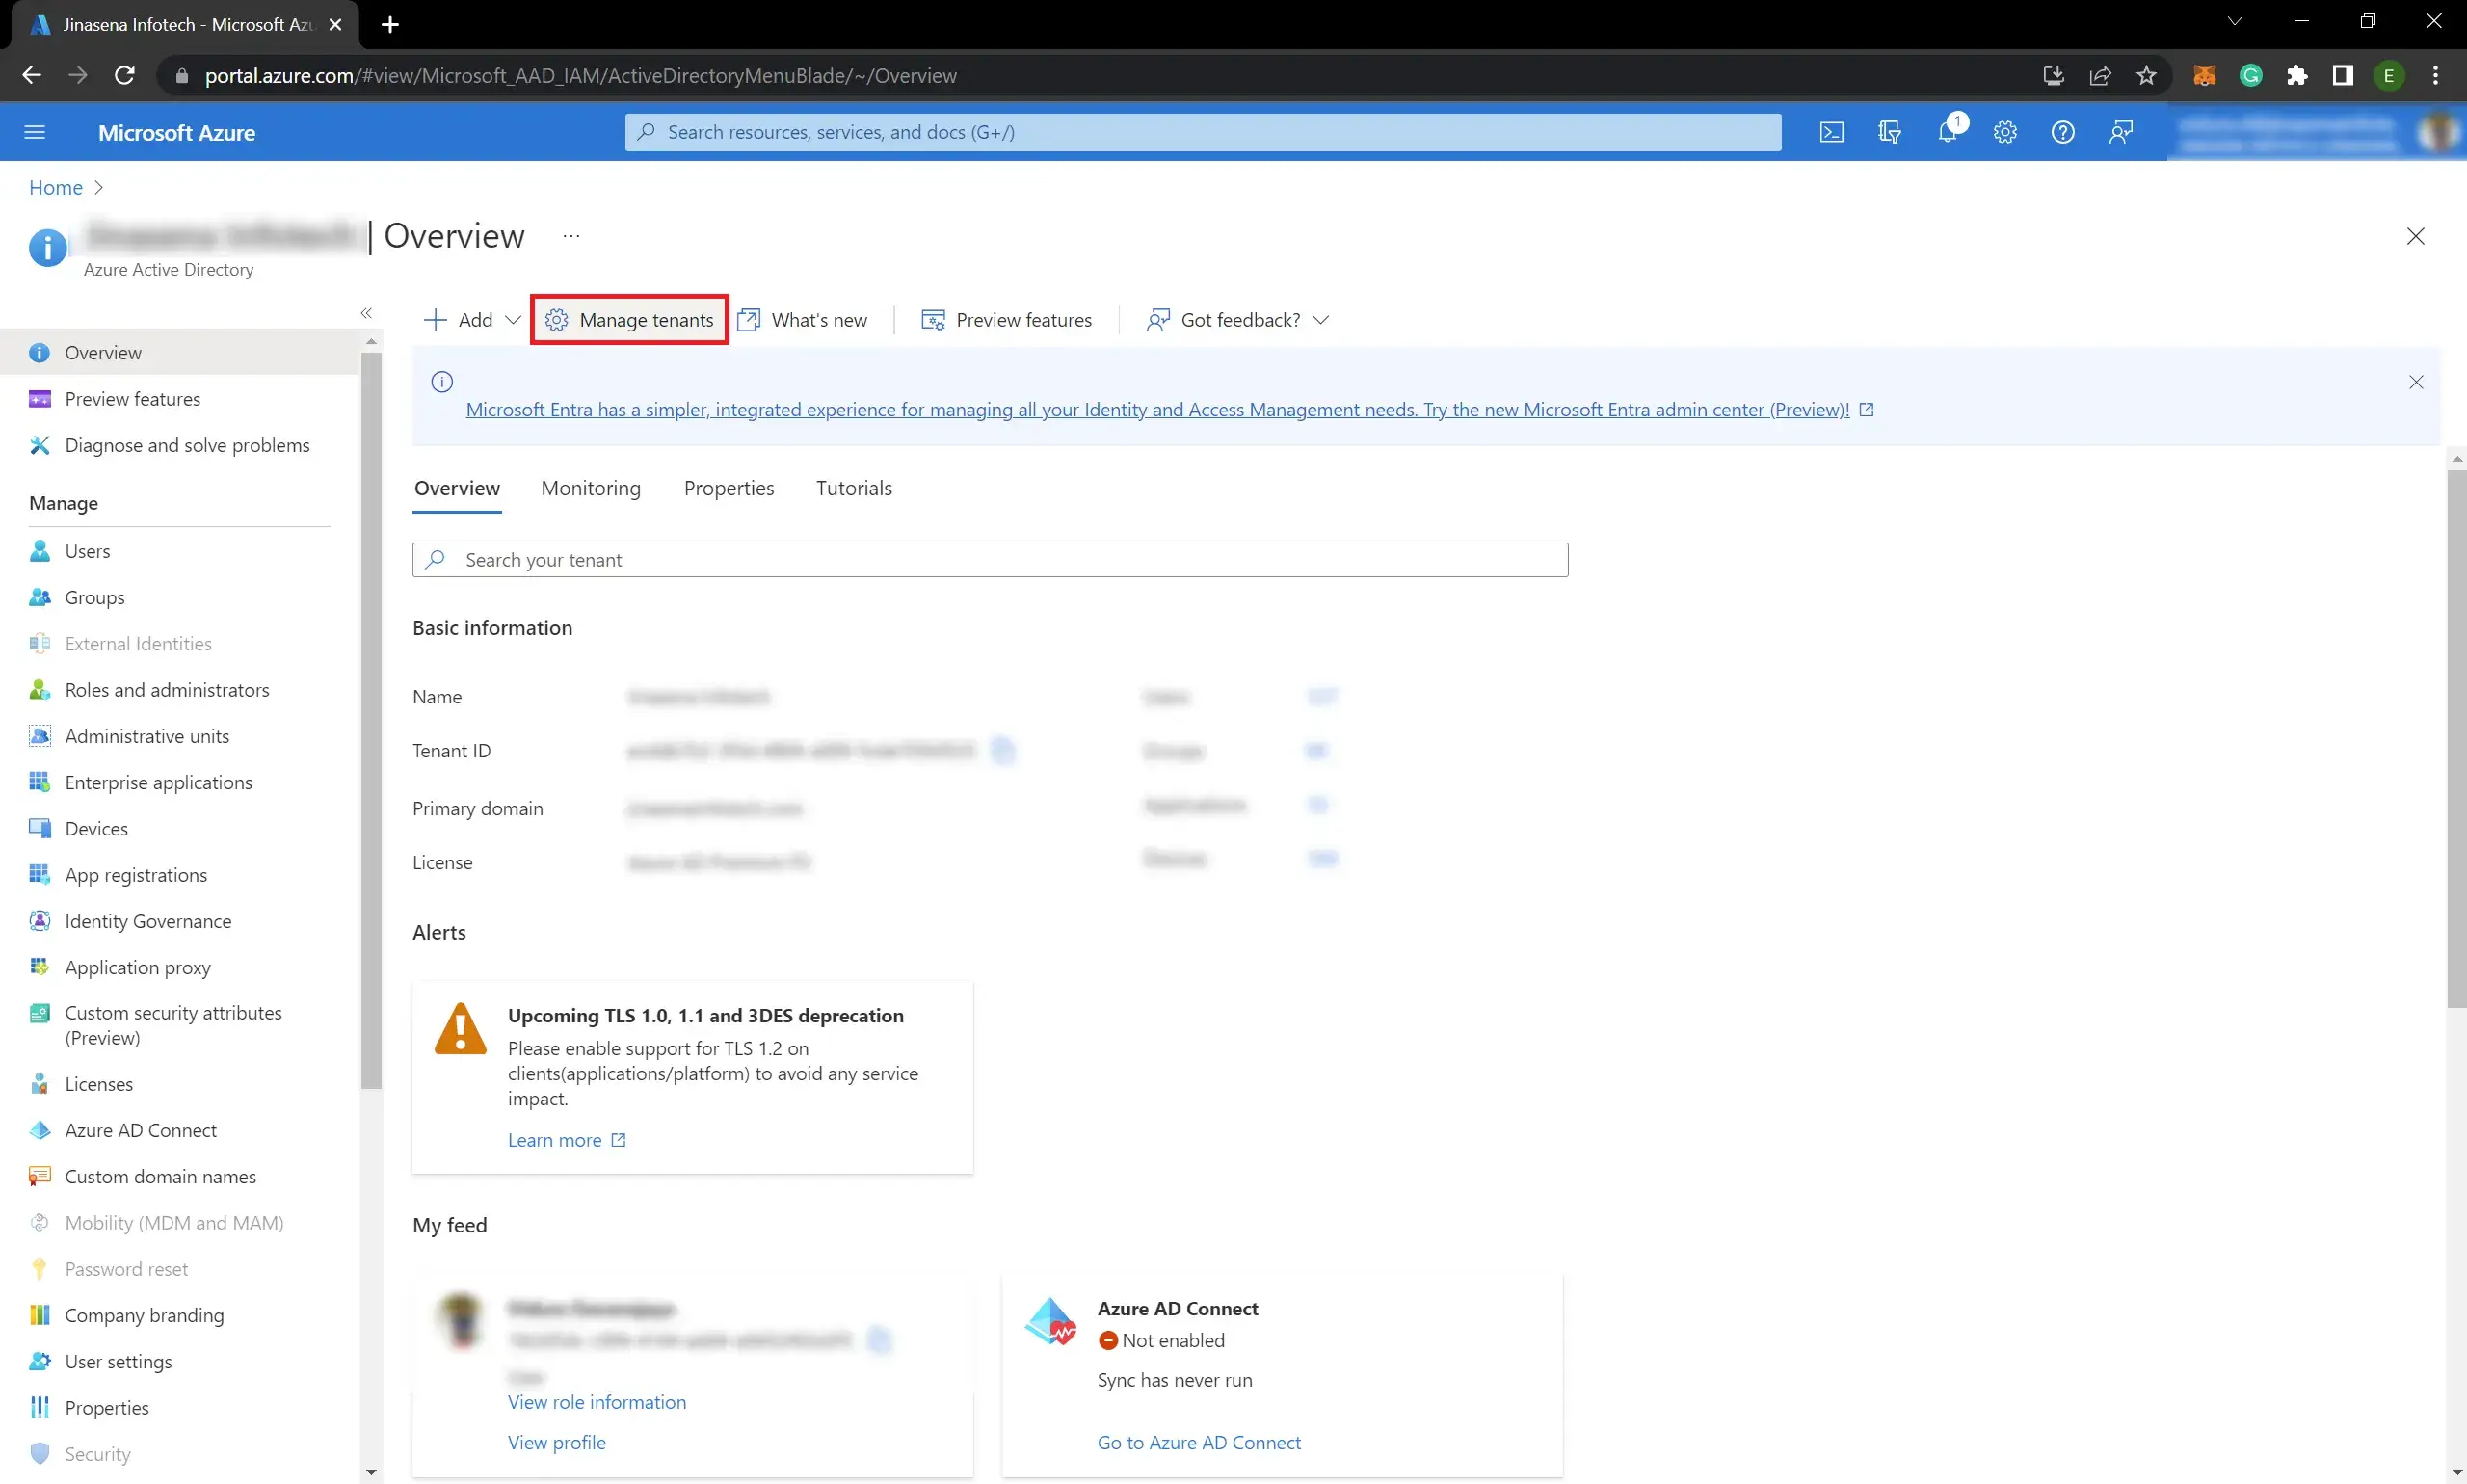
- Click Manage tenants:
- Click Create to start creating a new tenant:
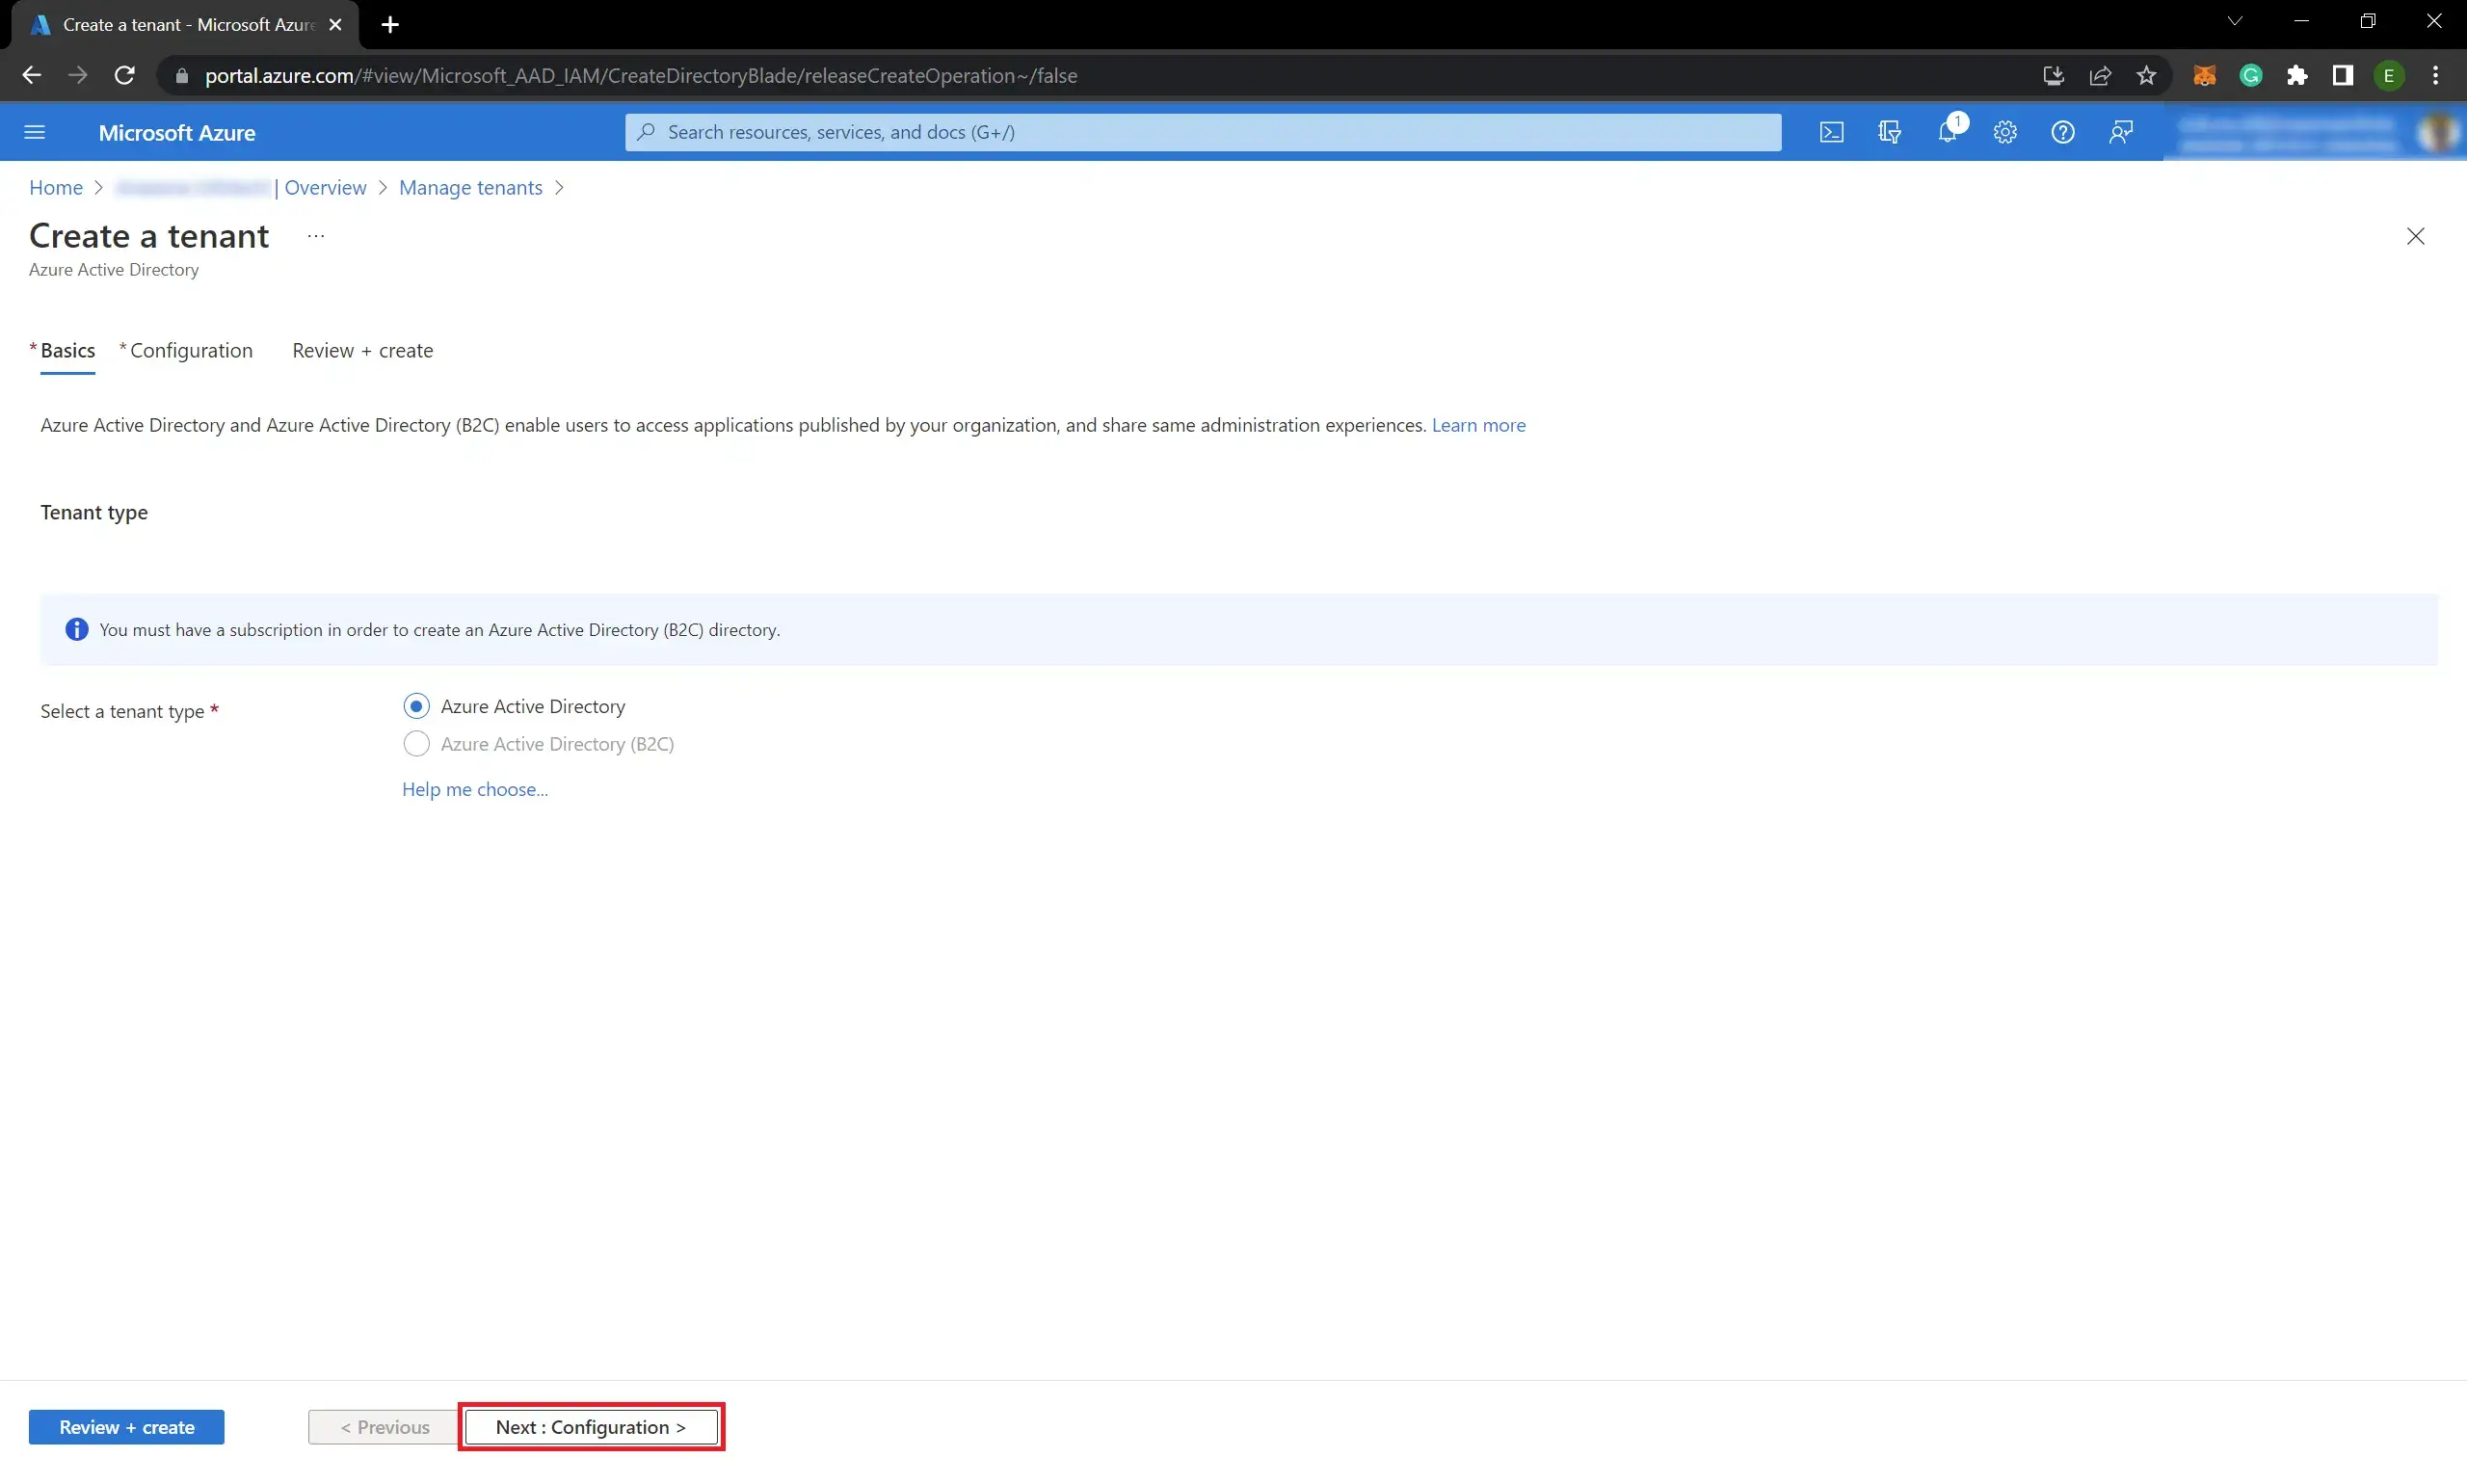
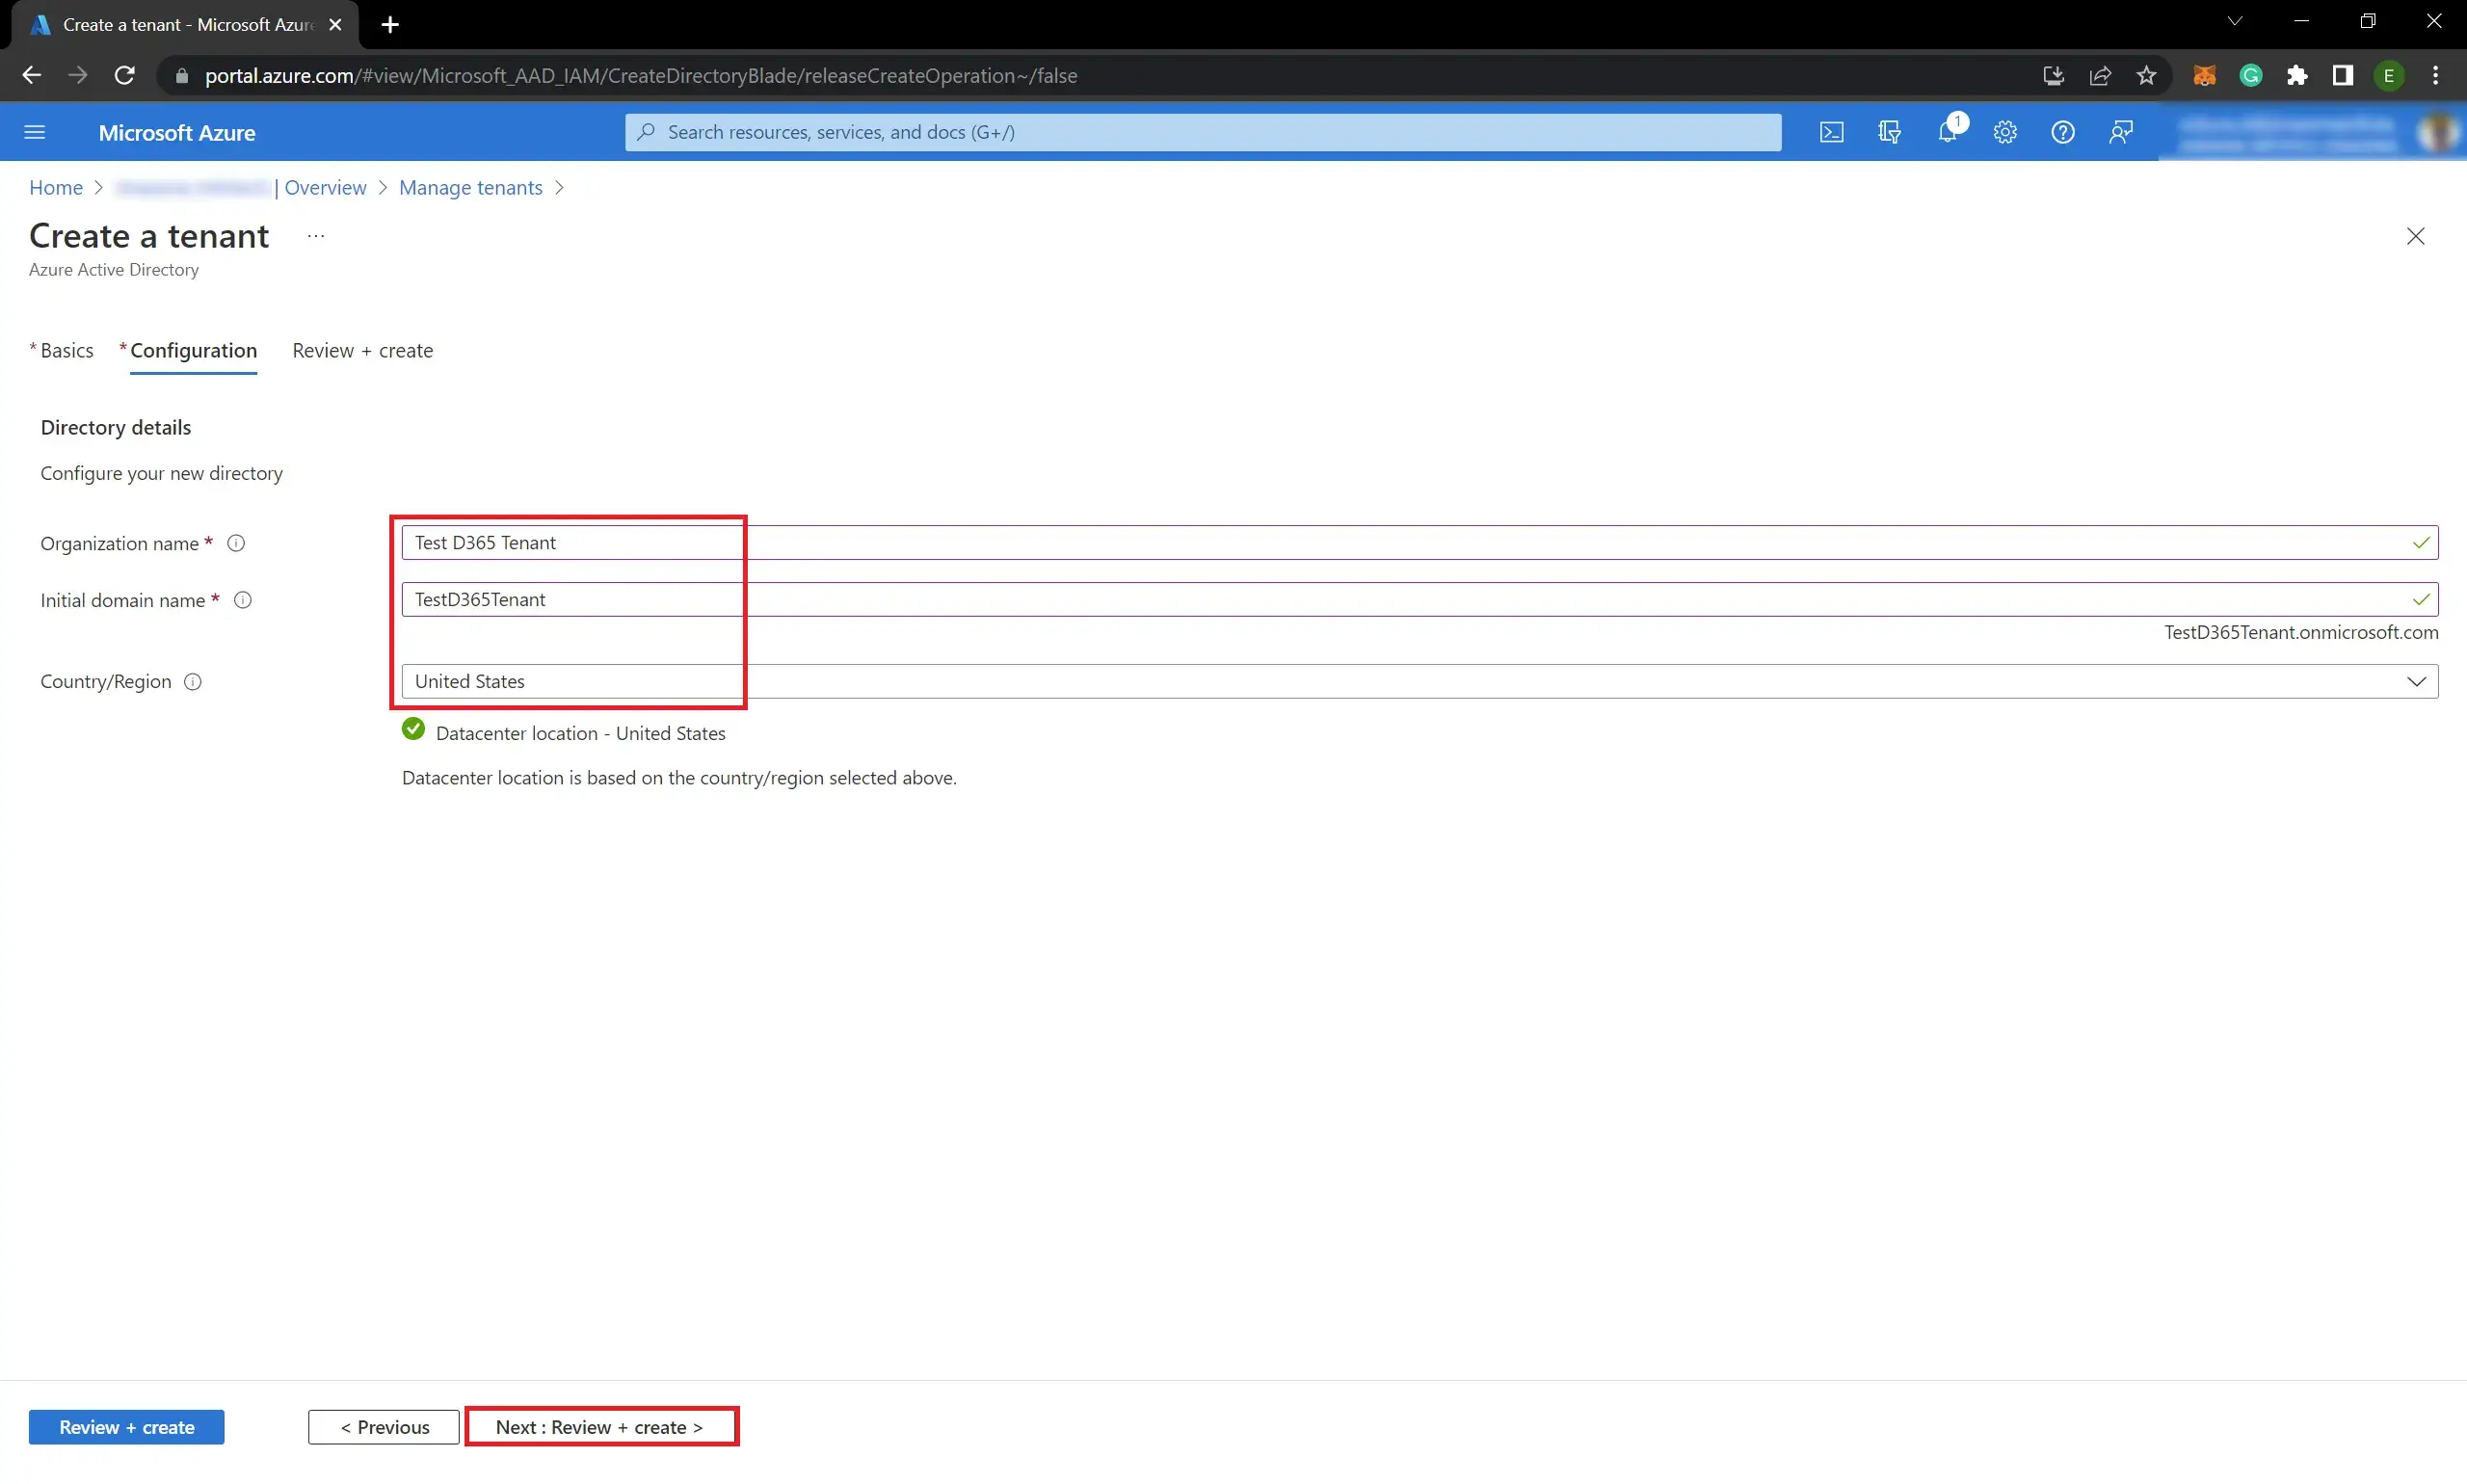
- Click Next : Configuration >:
- Fill the mandatory fields and click Next : Review + create >:
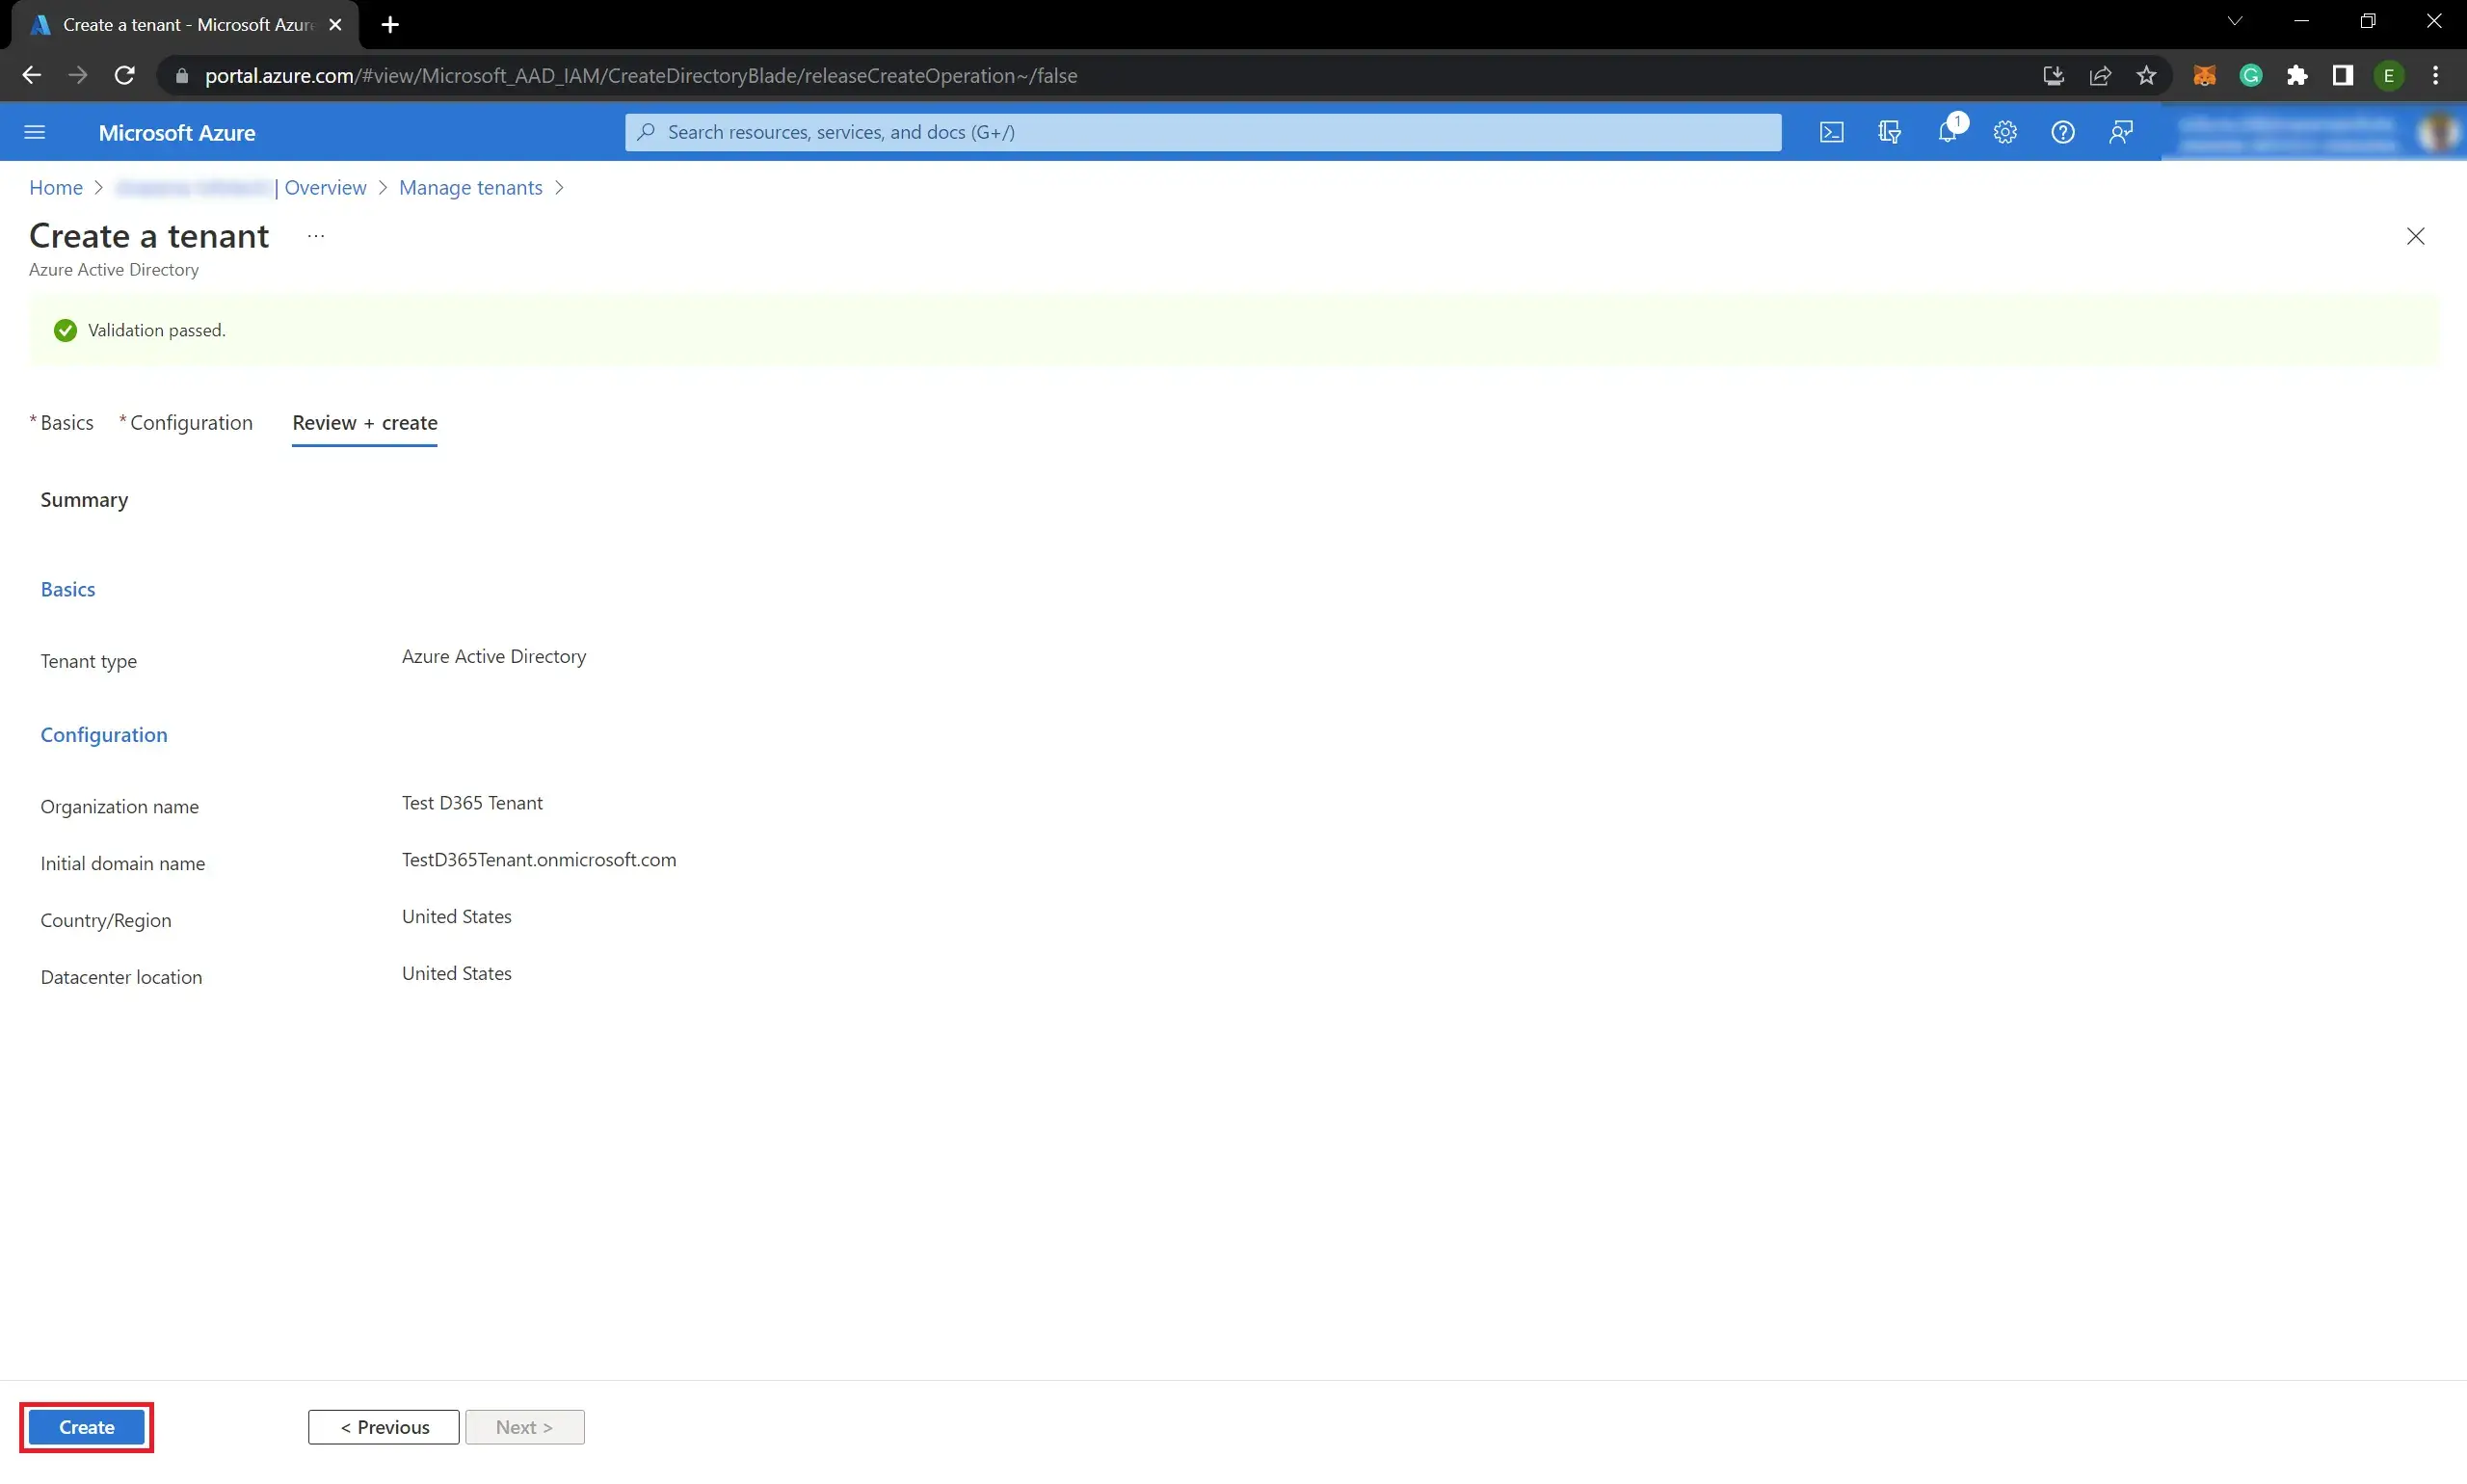
If the application that you want to install in this tenant is not eligible for your country and if it is only for testing purposes, It is better to select United States or another eligible country. - Click Create:
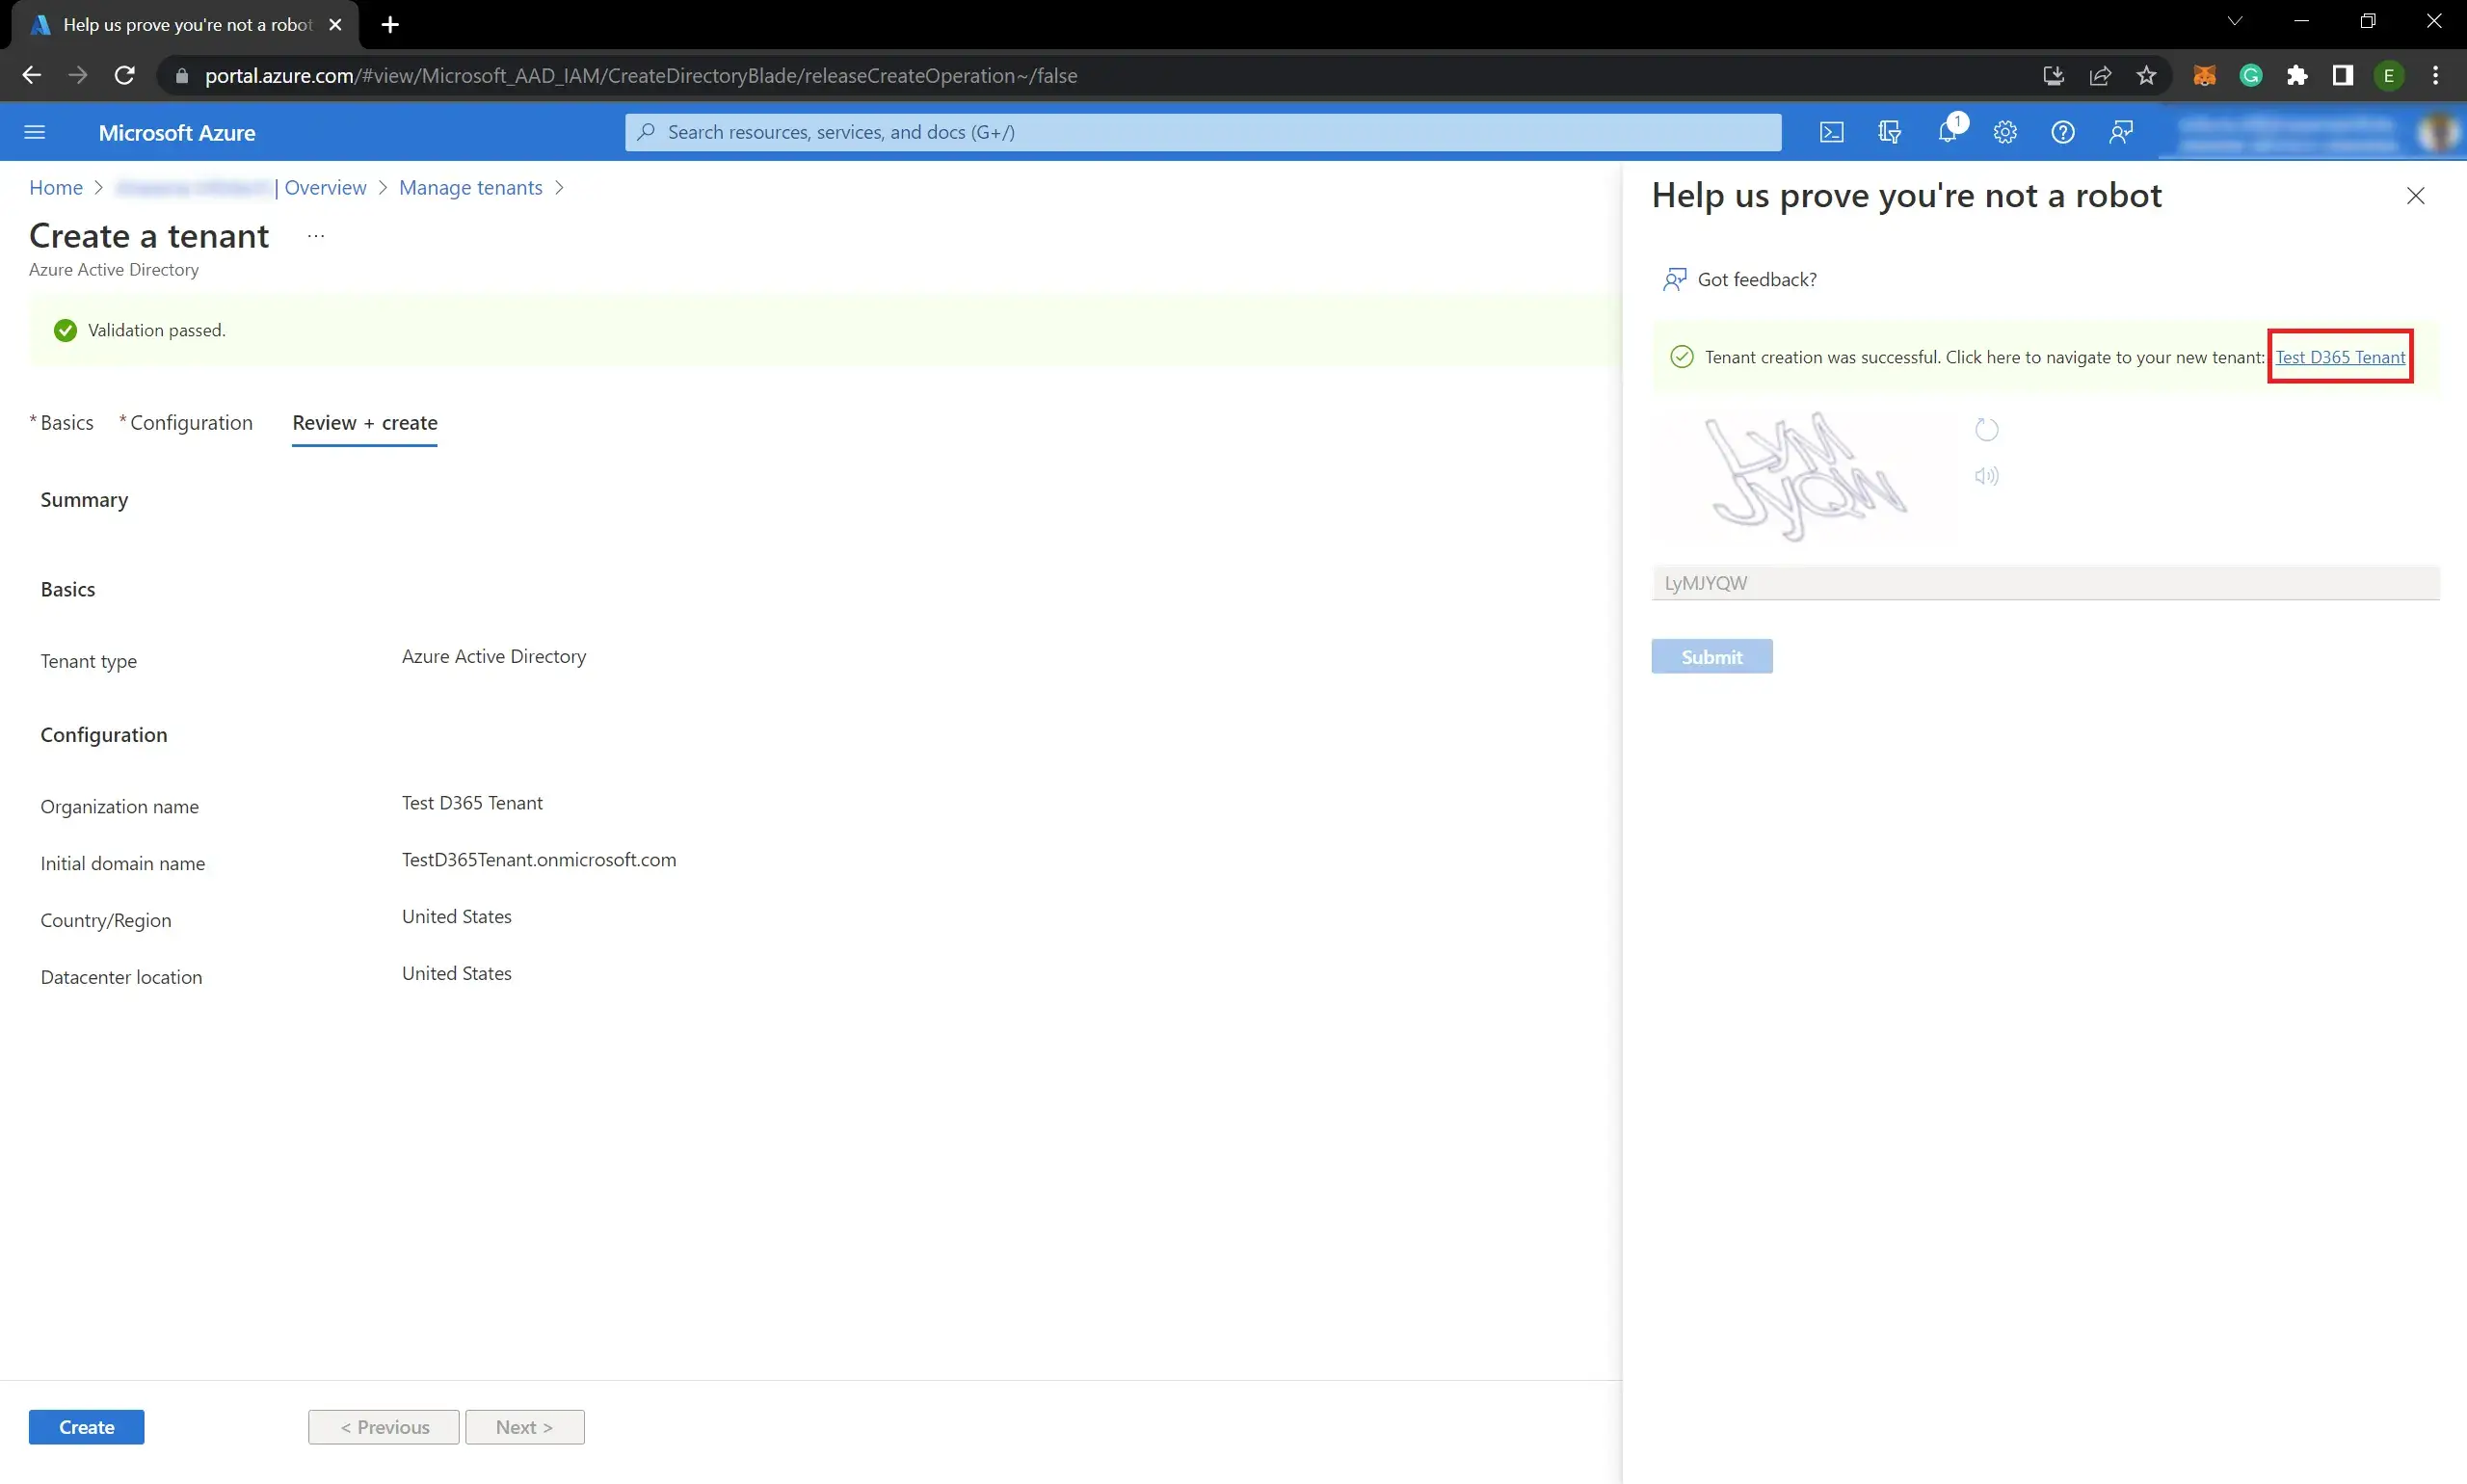
- After a few minutes, the tenant will be created successfully:
How to add a new user to the tenant
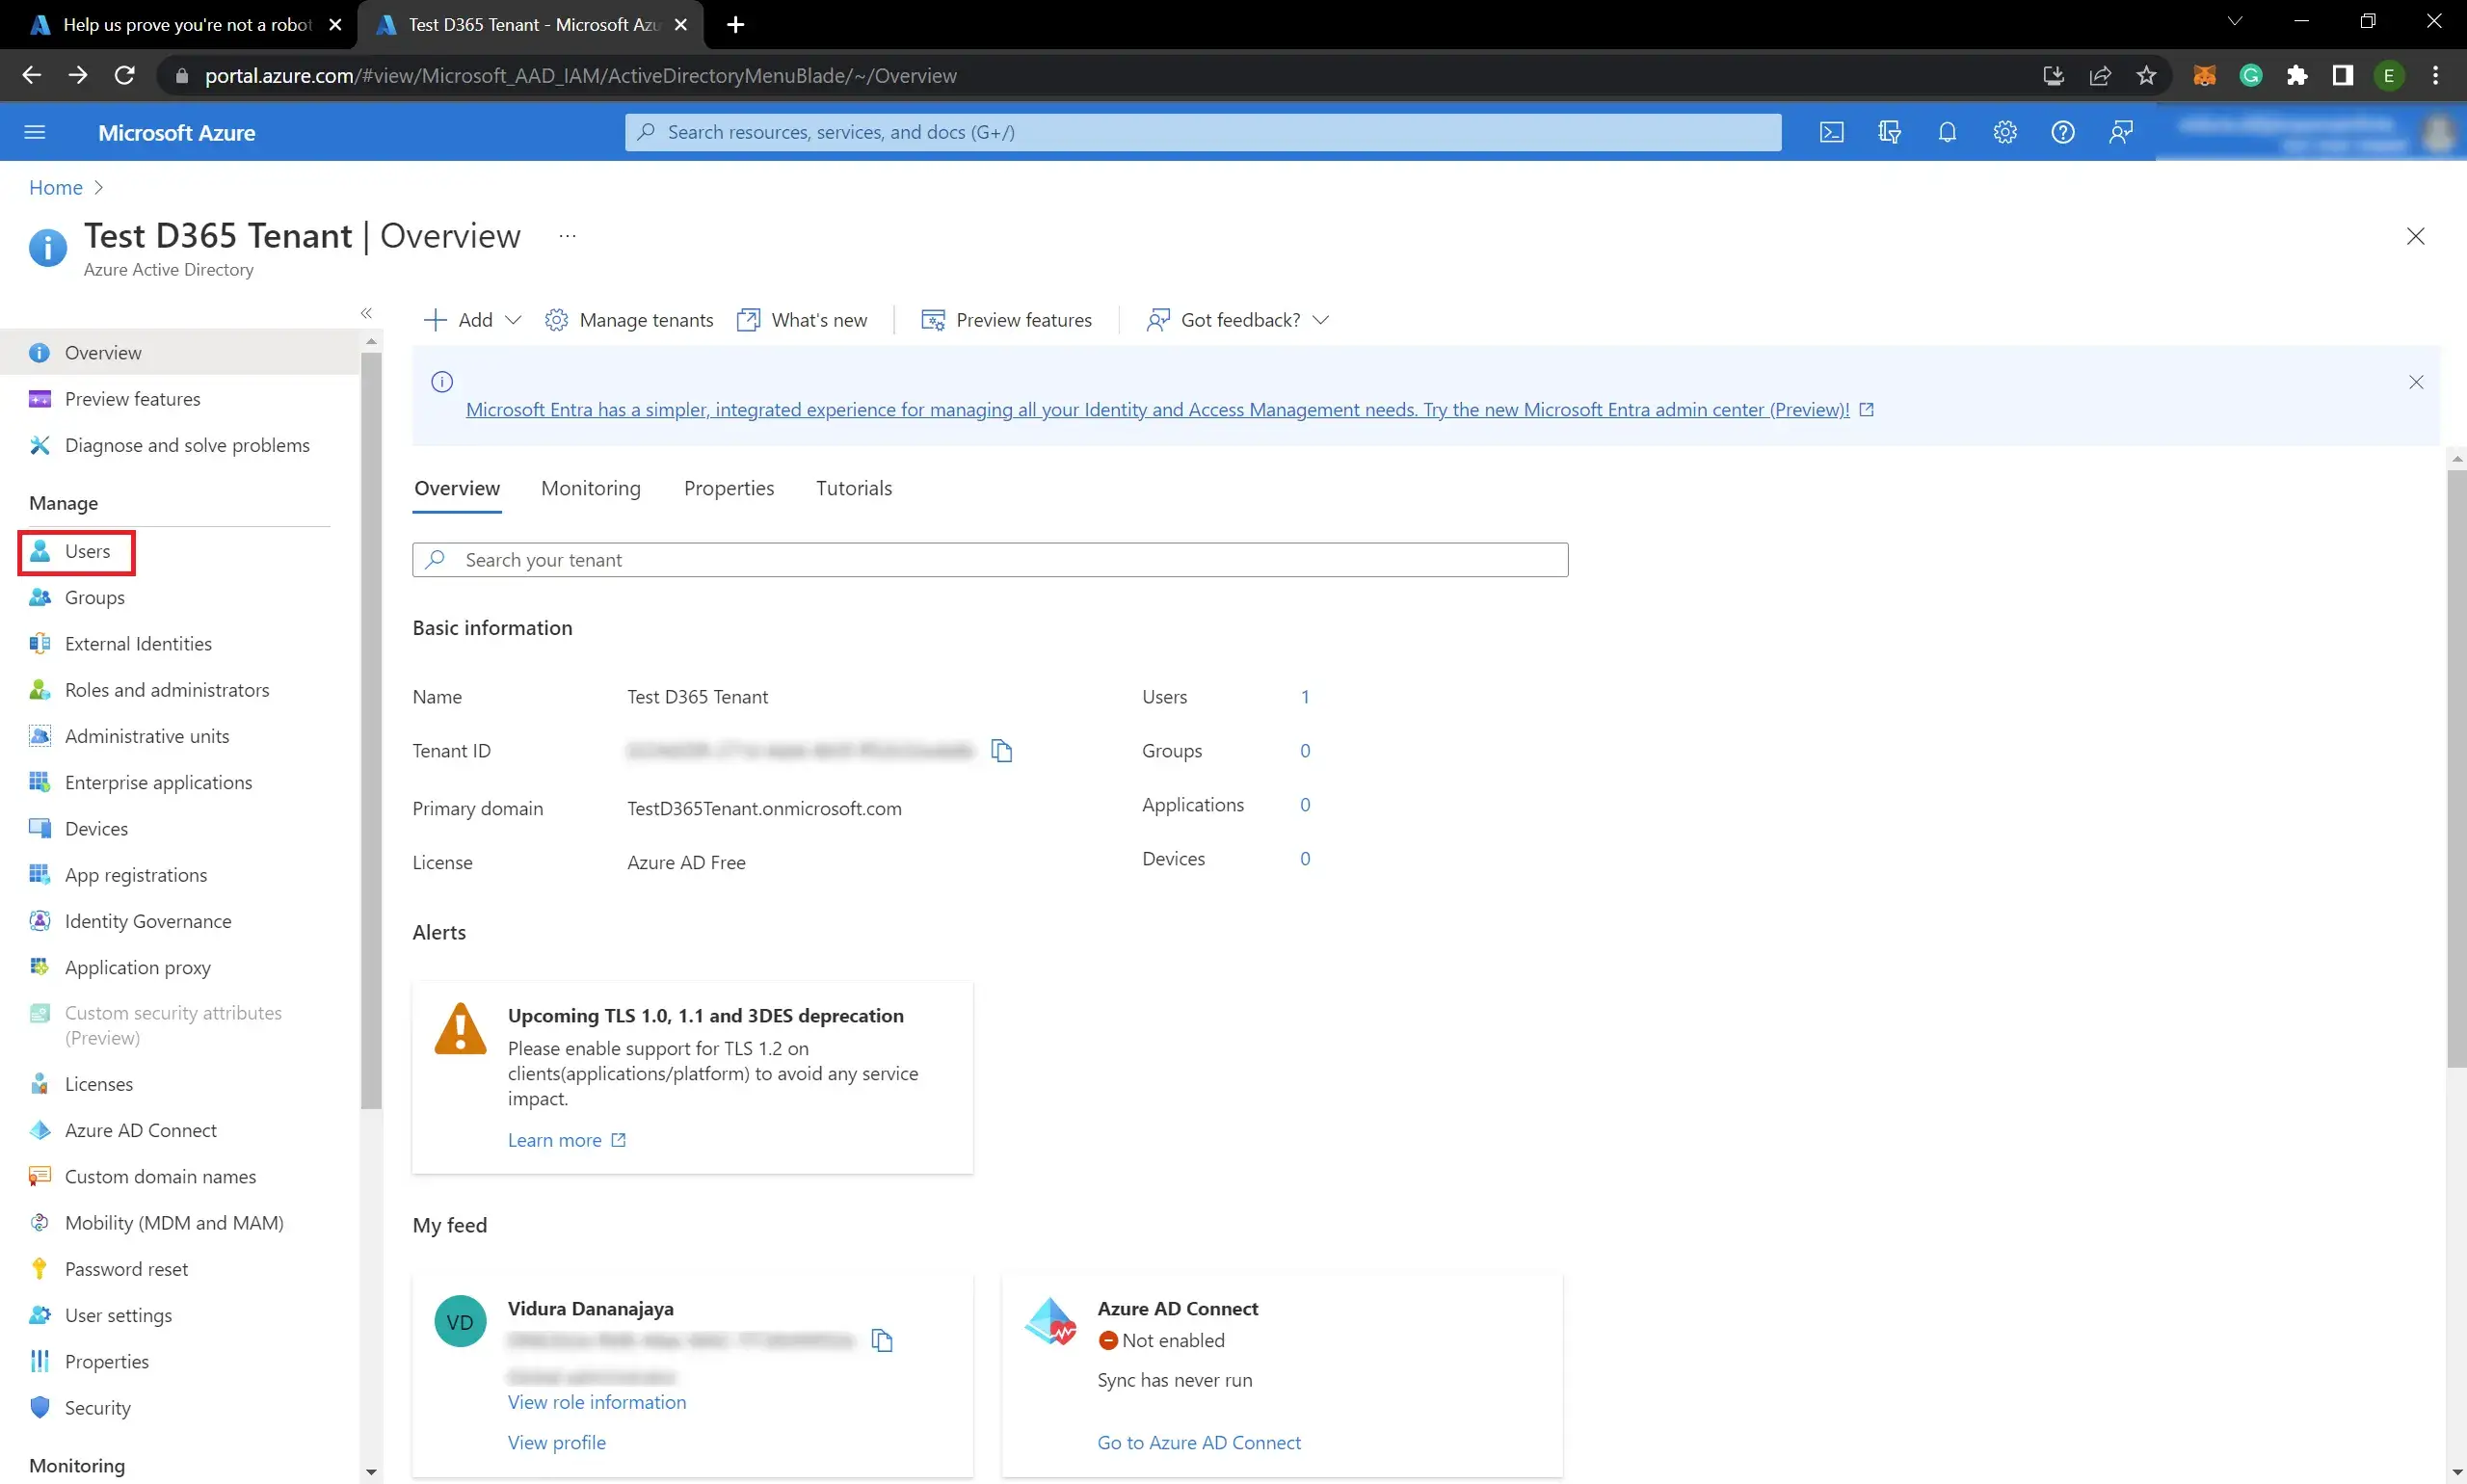
- Switch to the newly created tenant and click the Users:
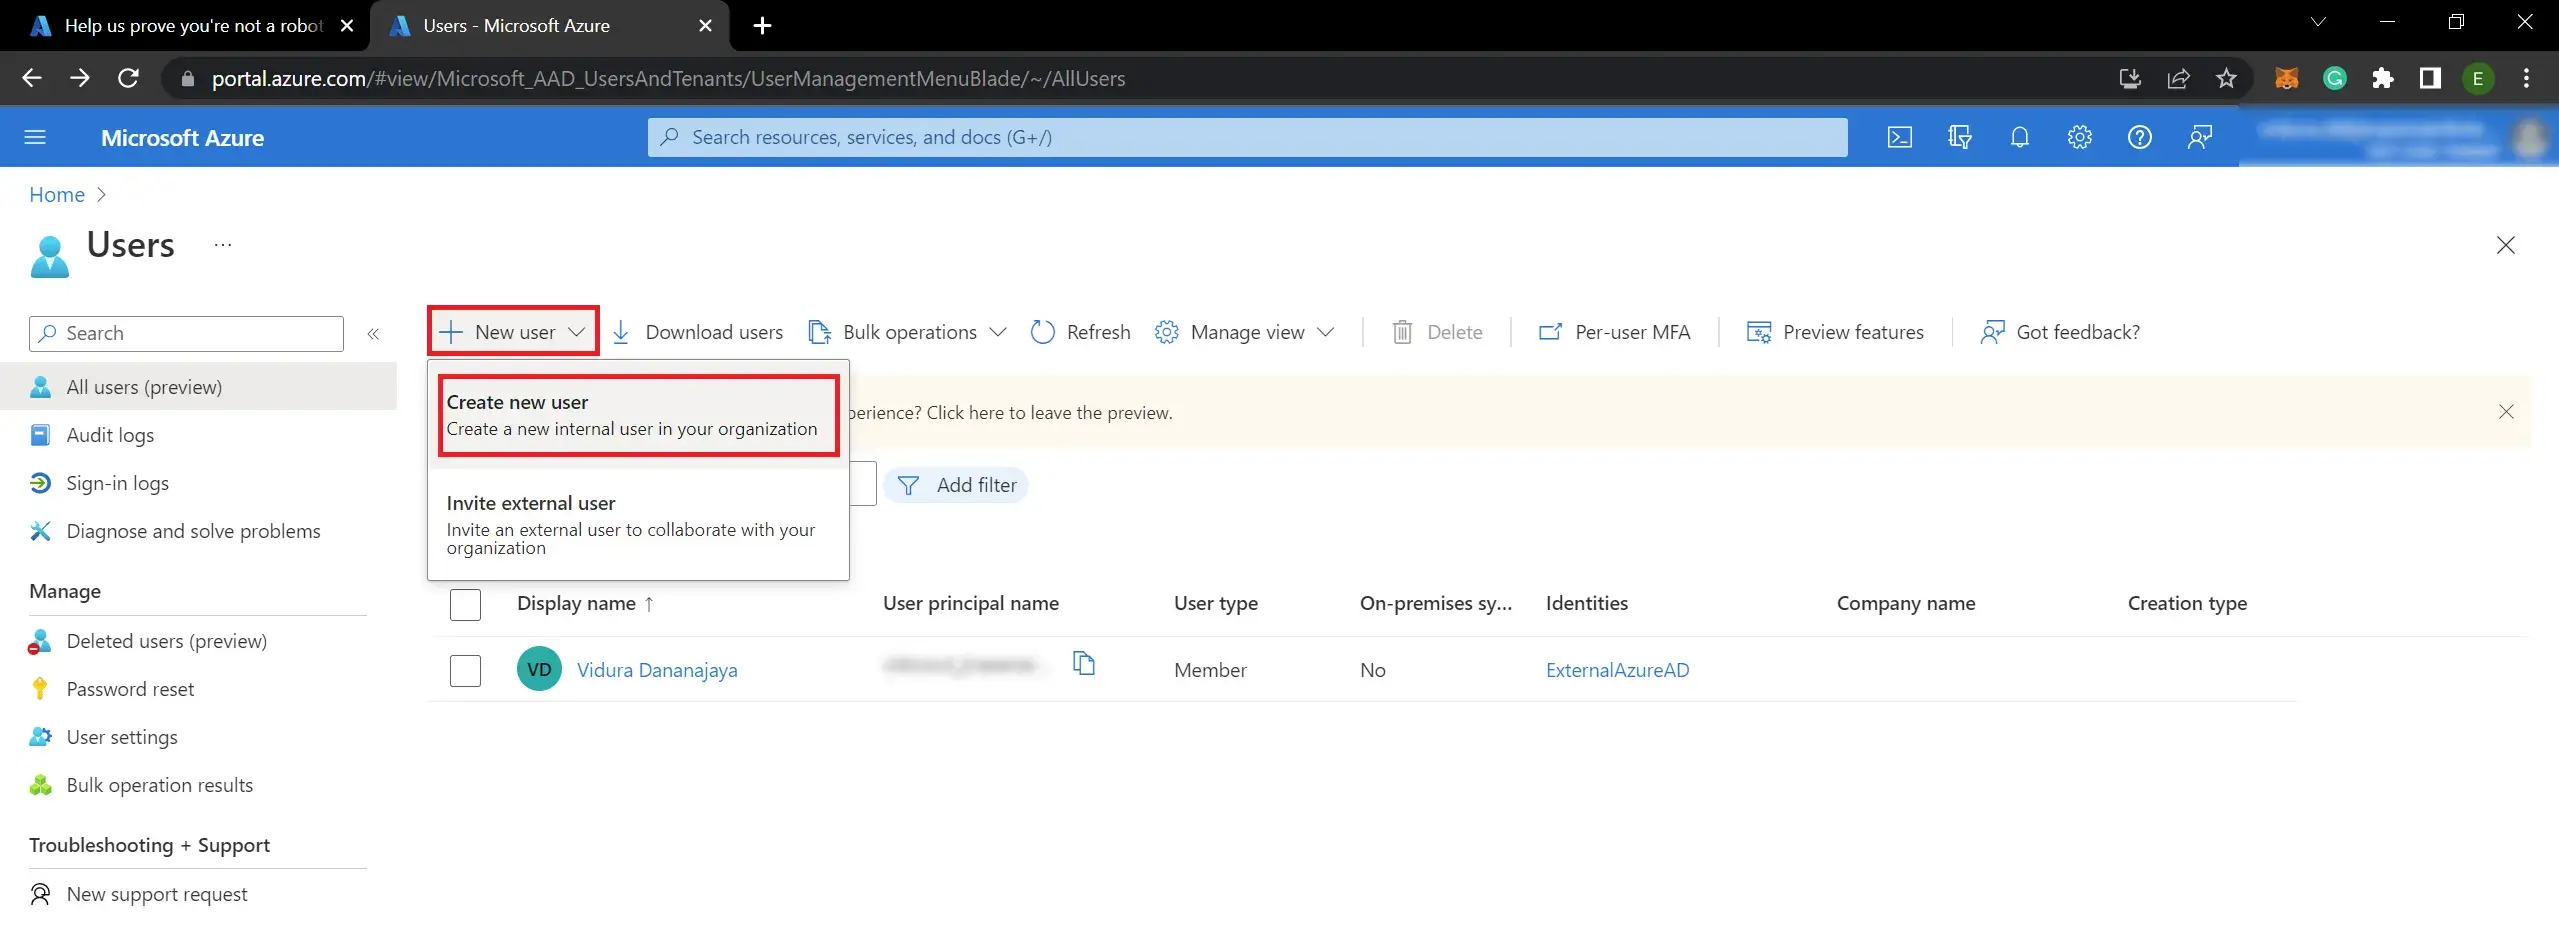
- Click New user >> Create new user:
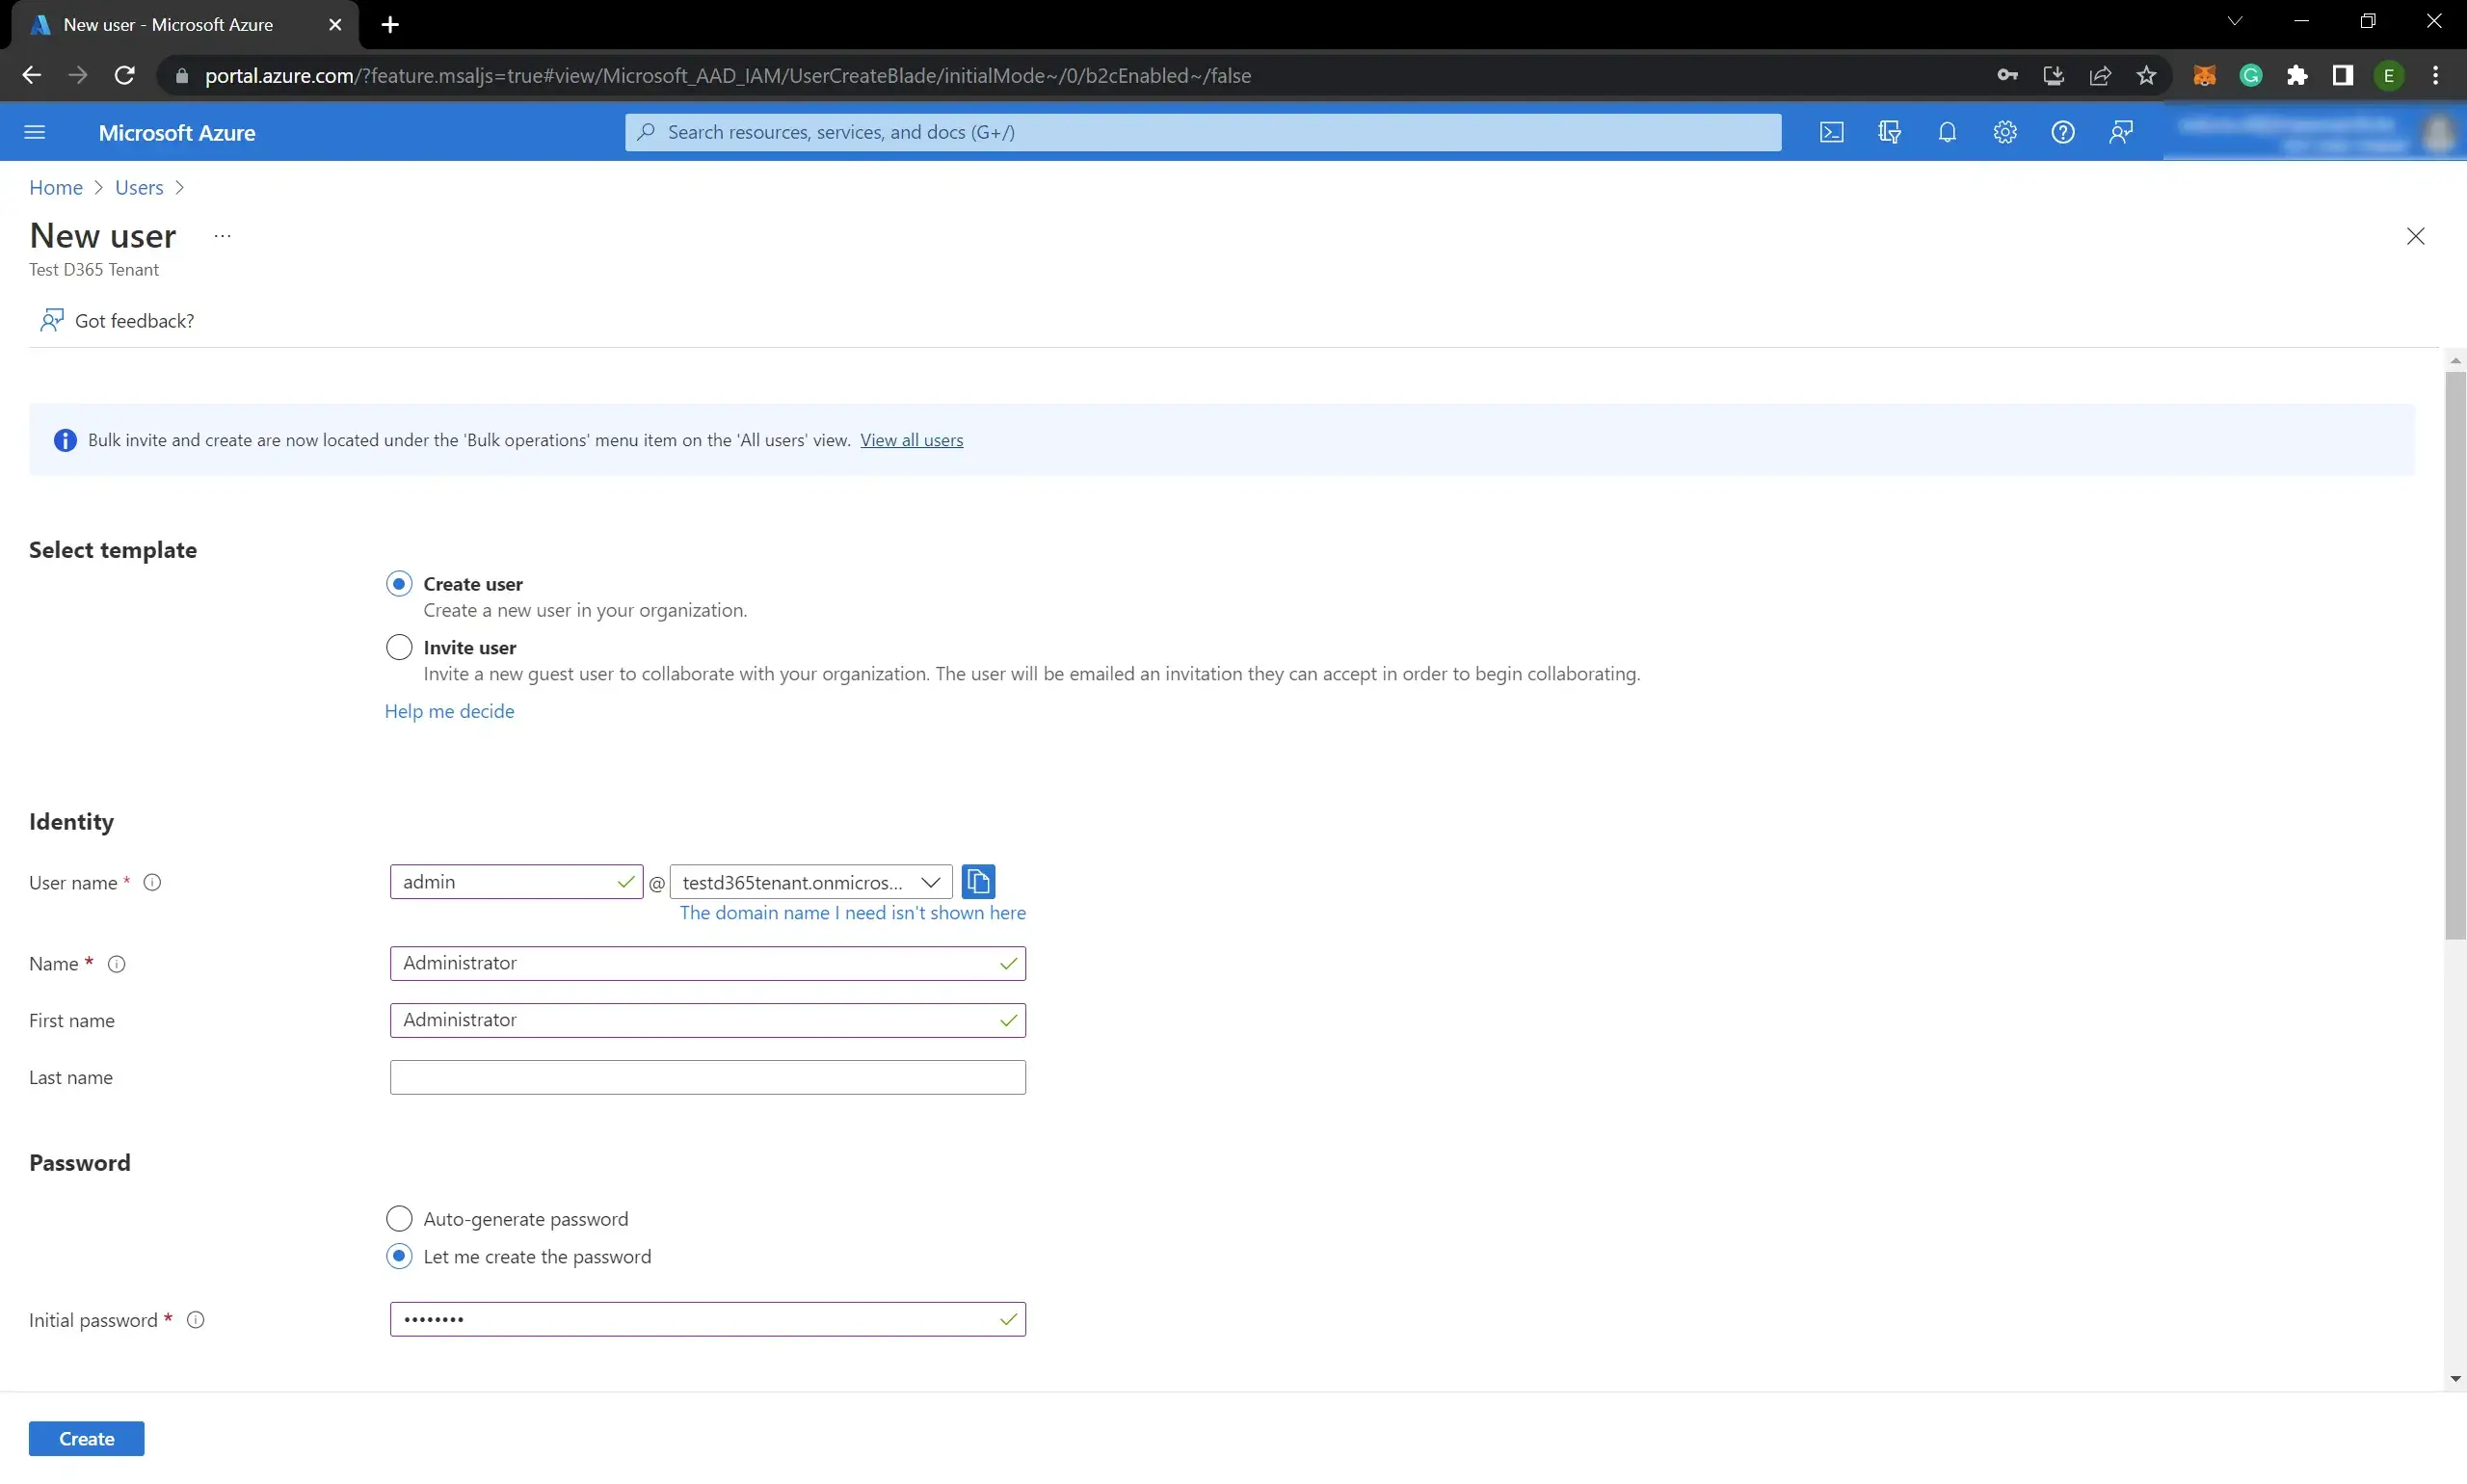
- Fill the details:
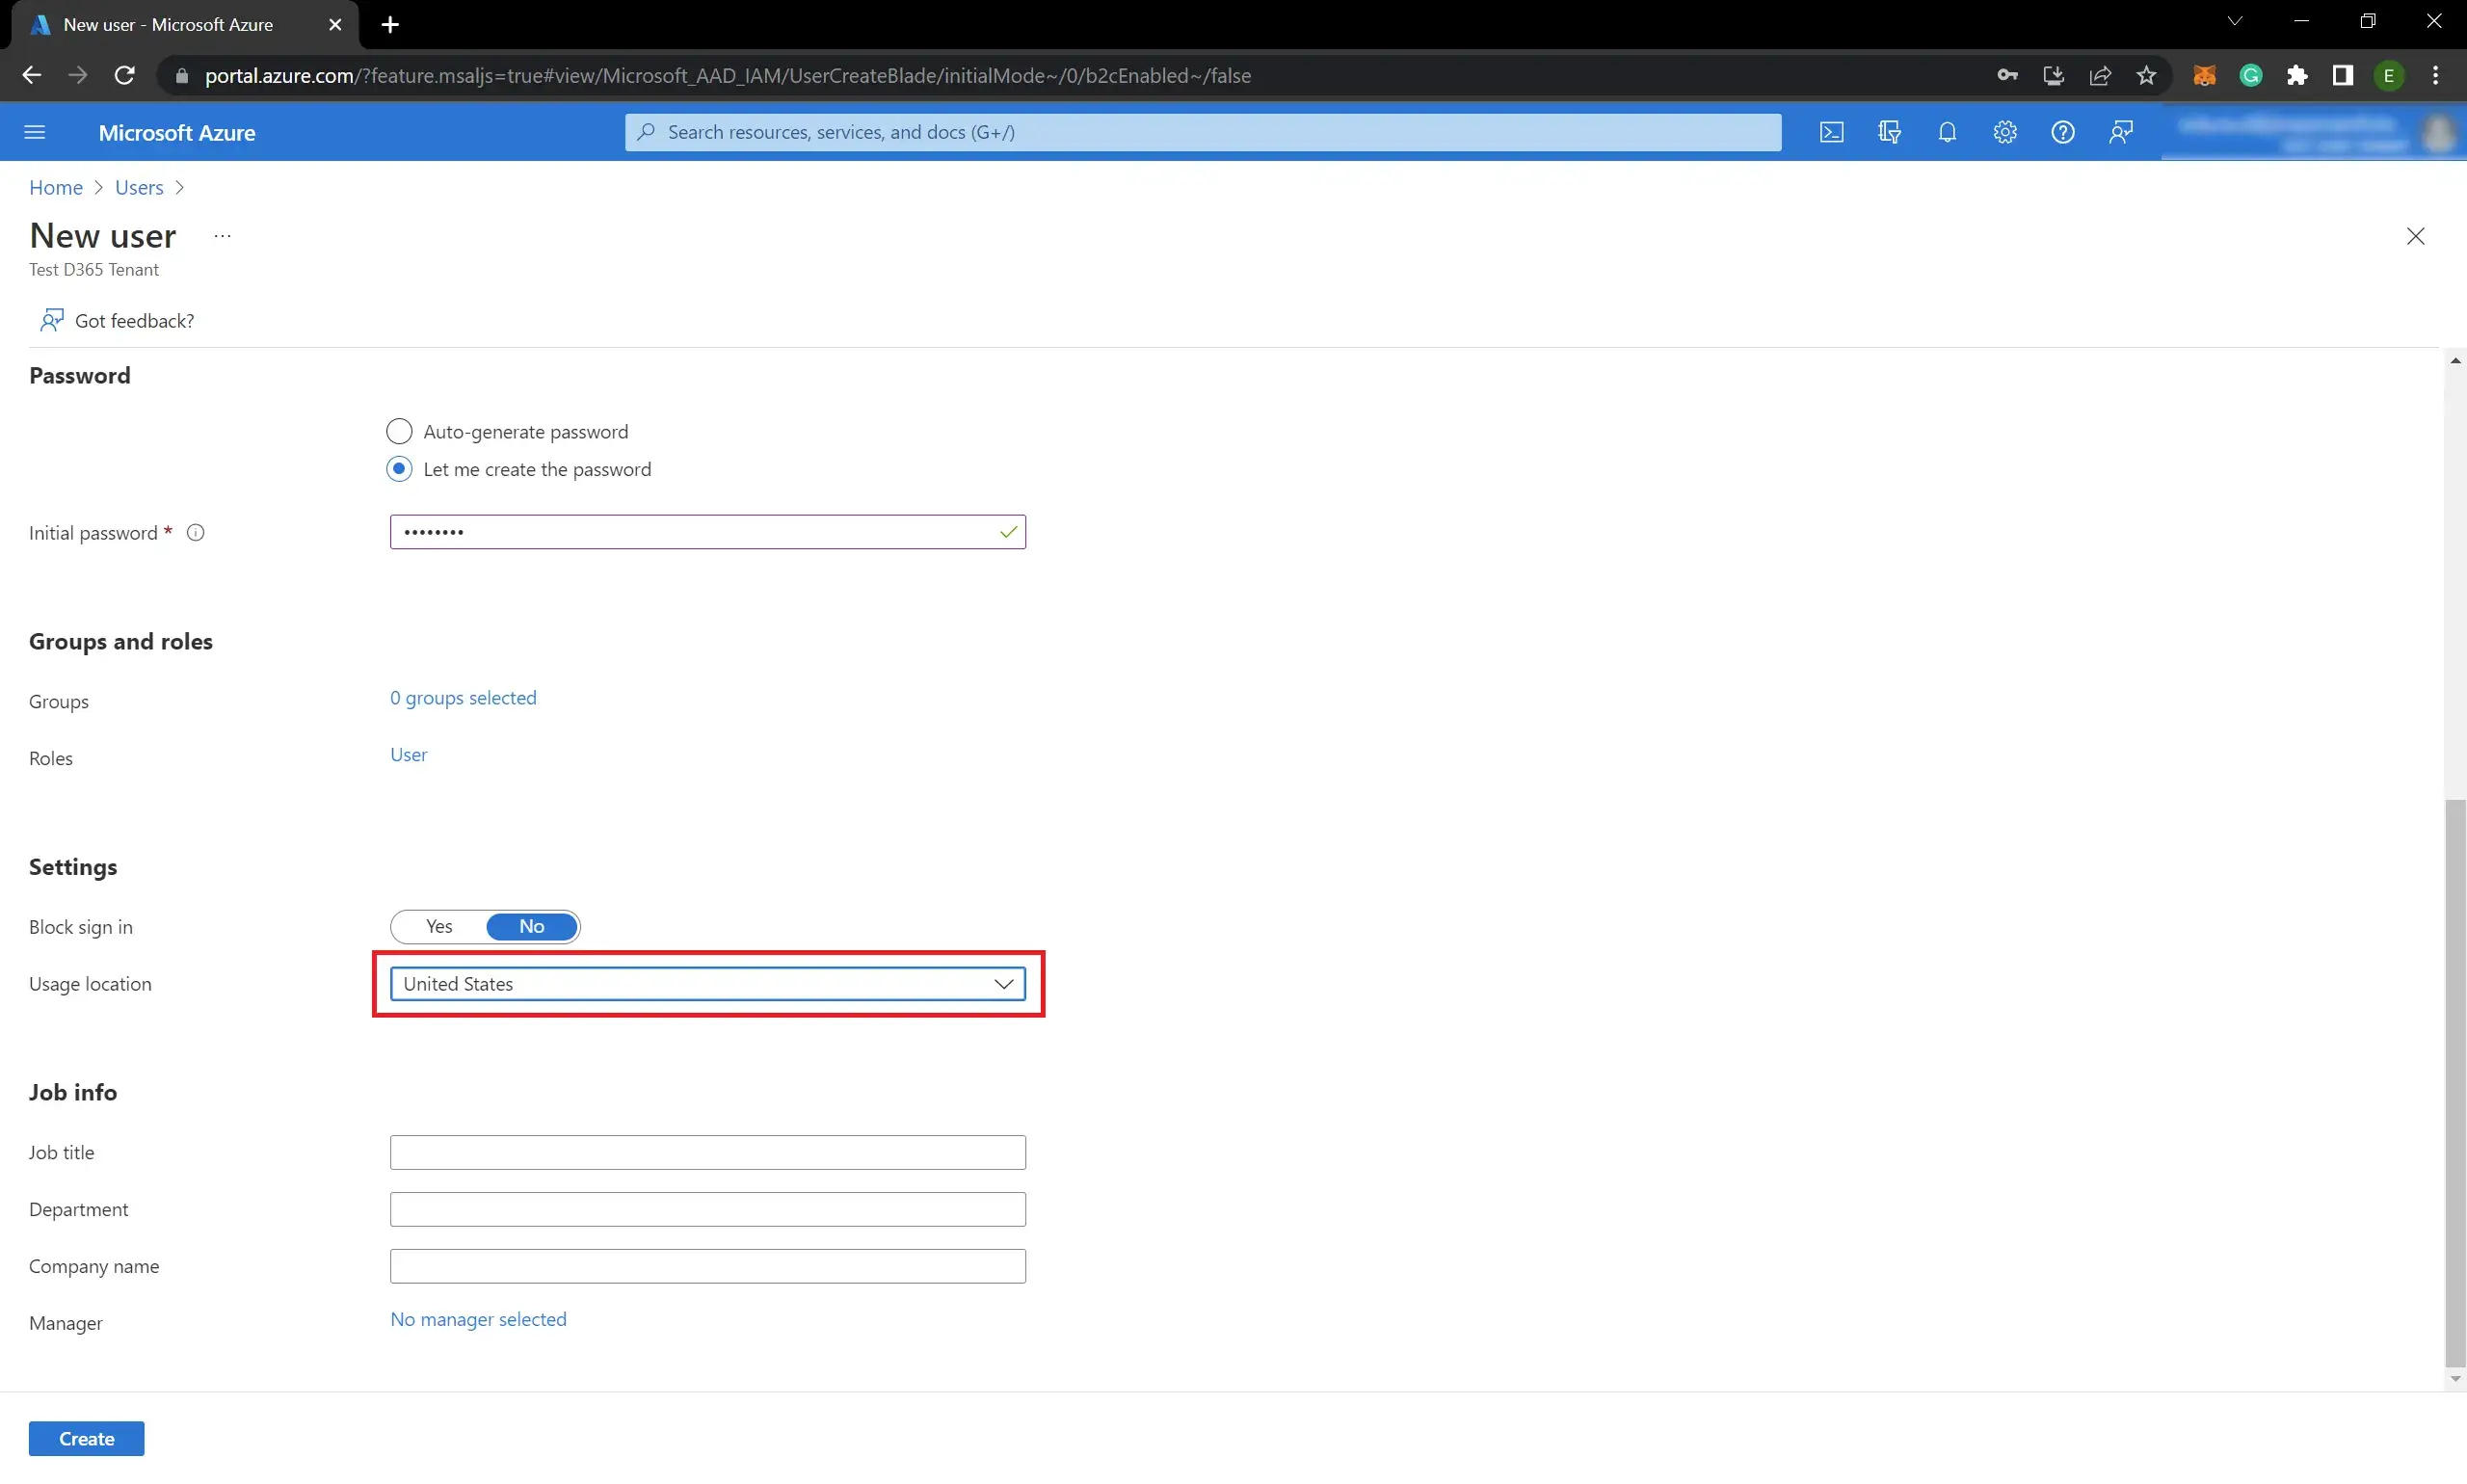
- Select Usage location:
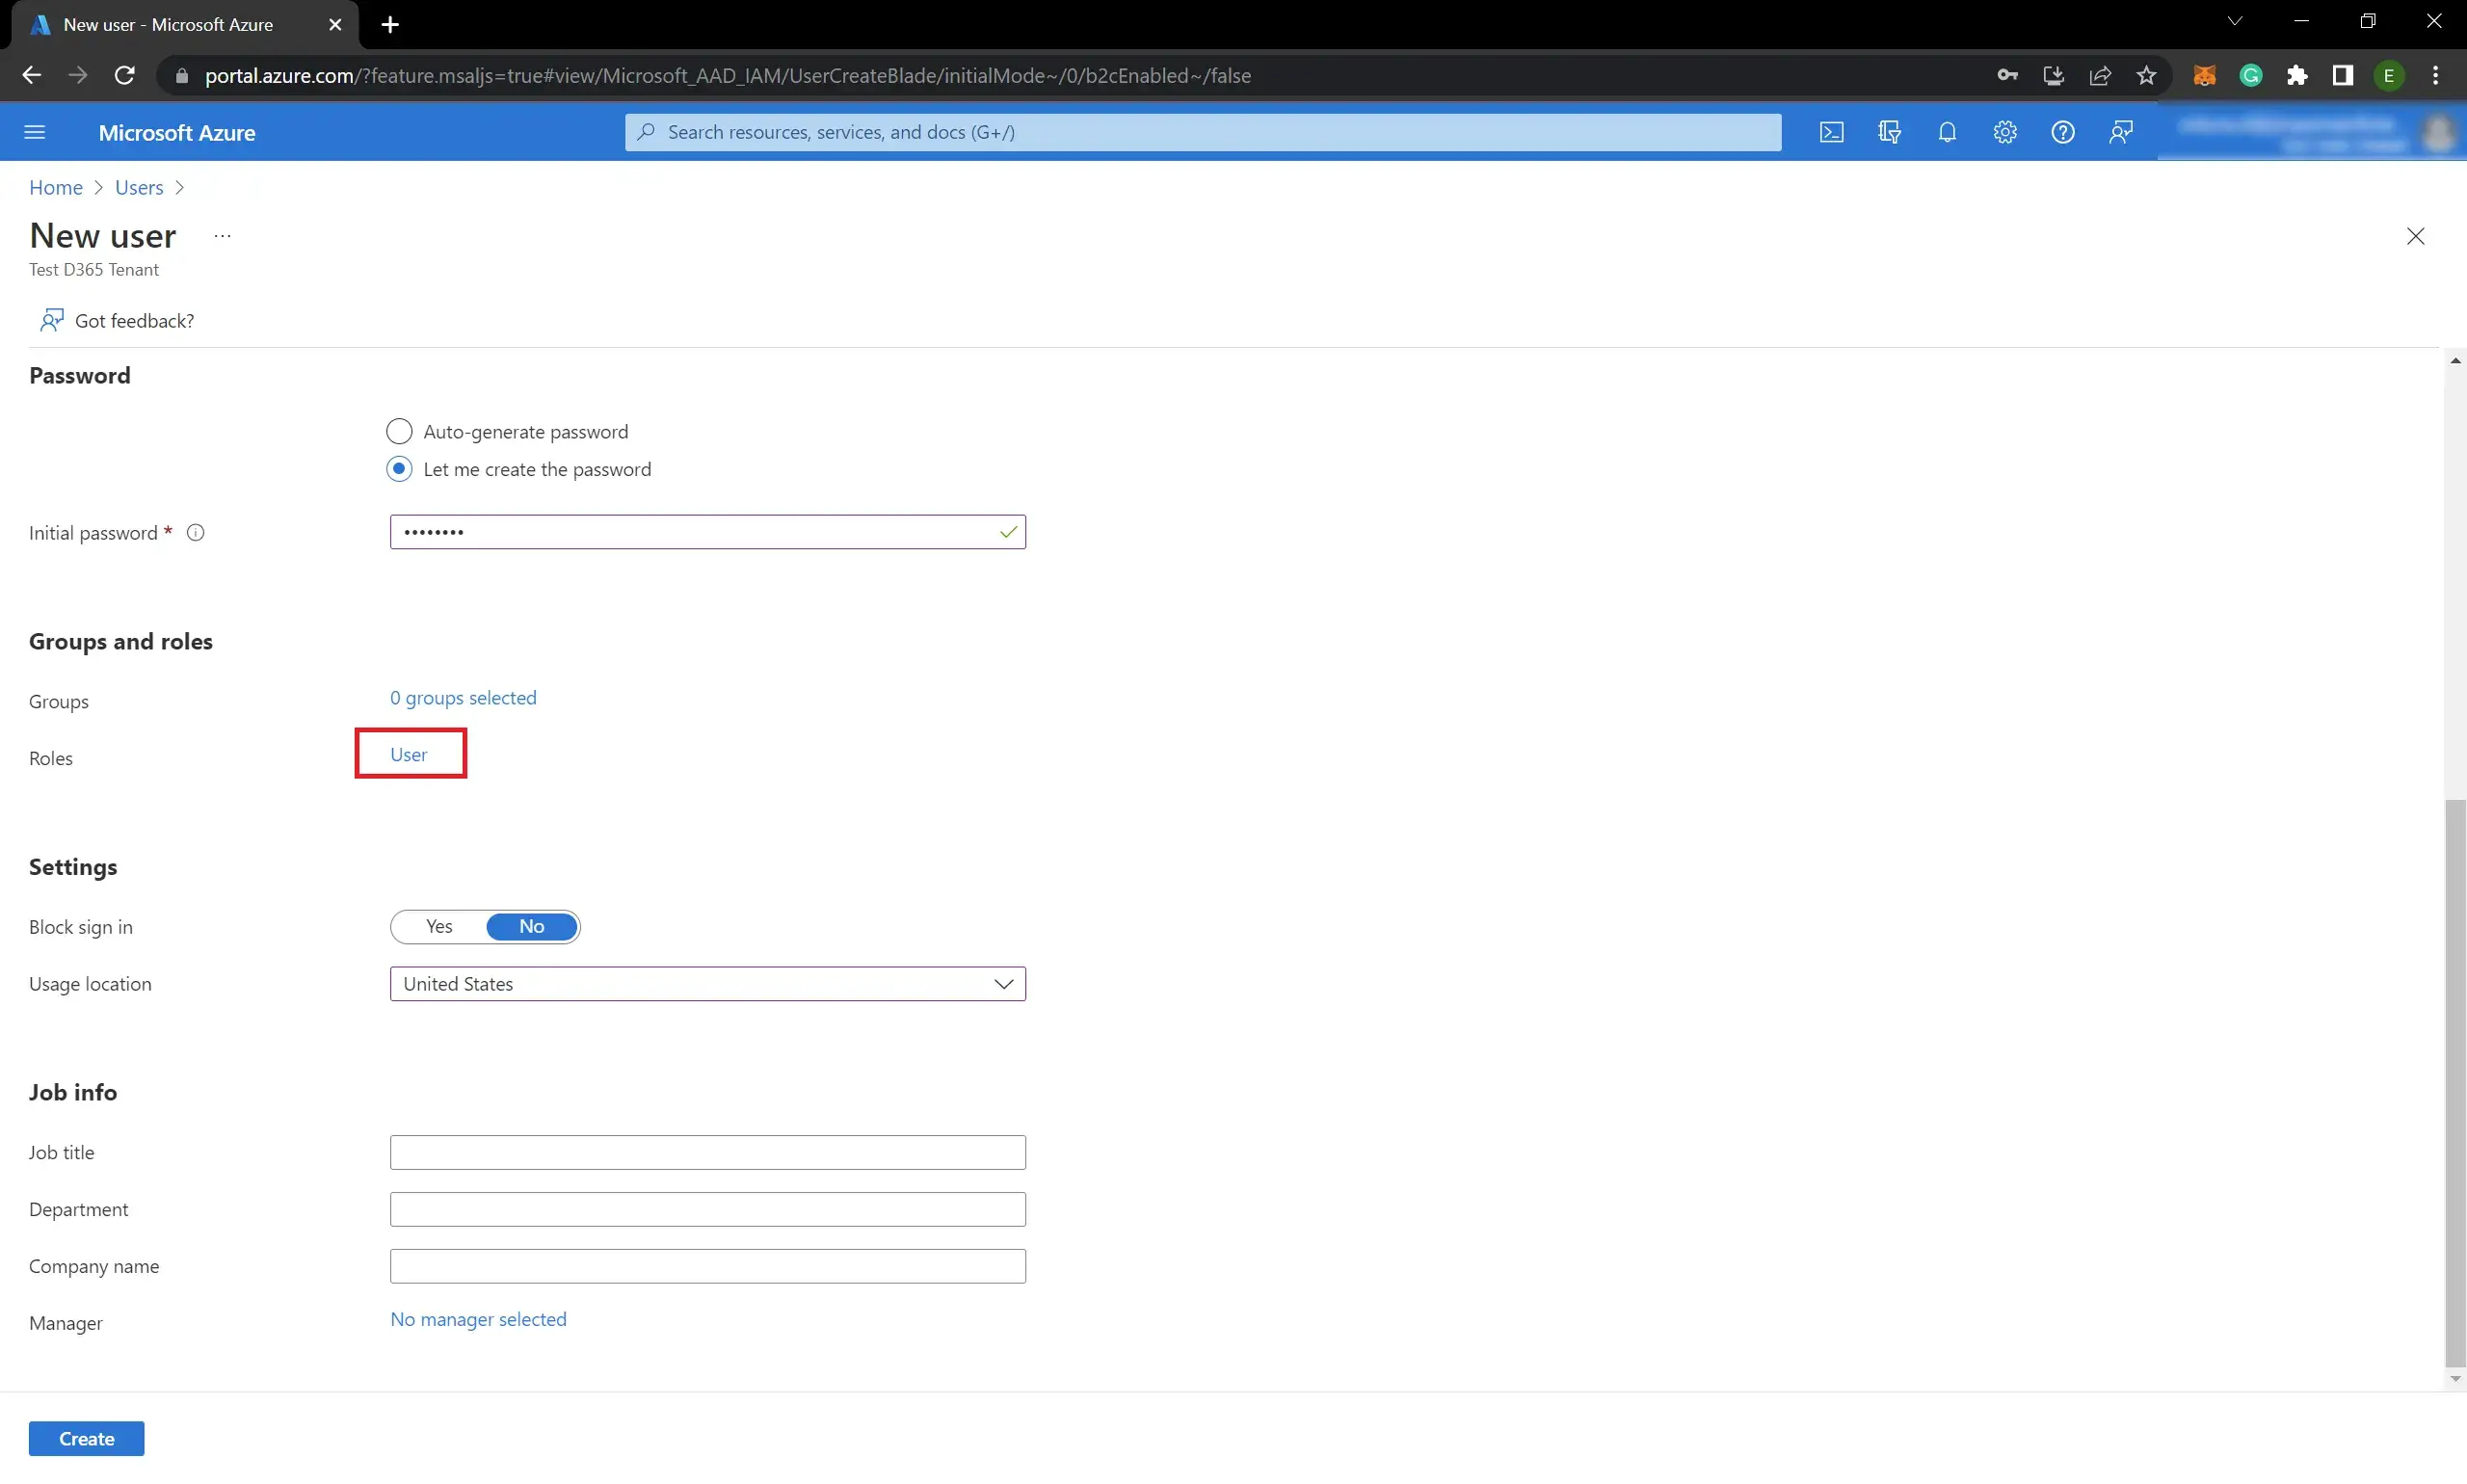
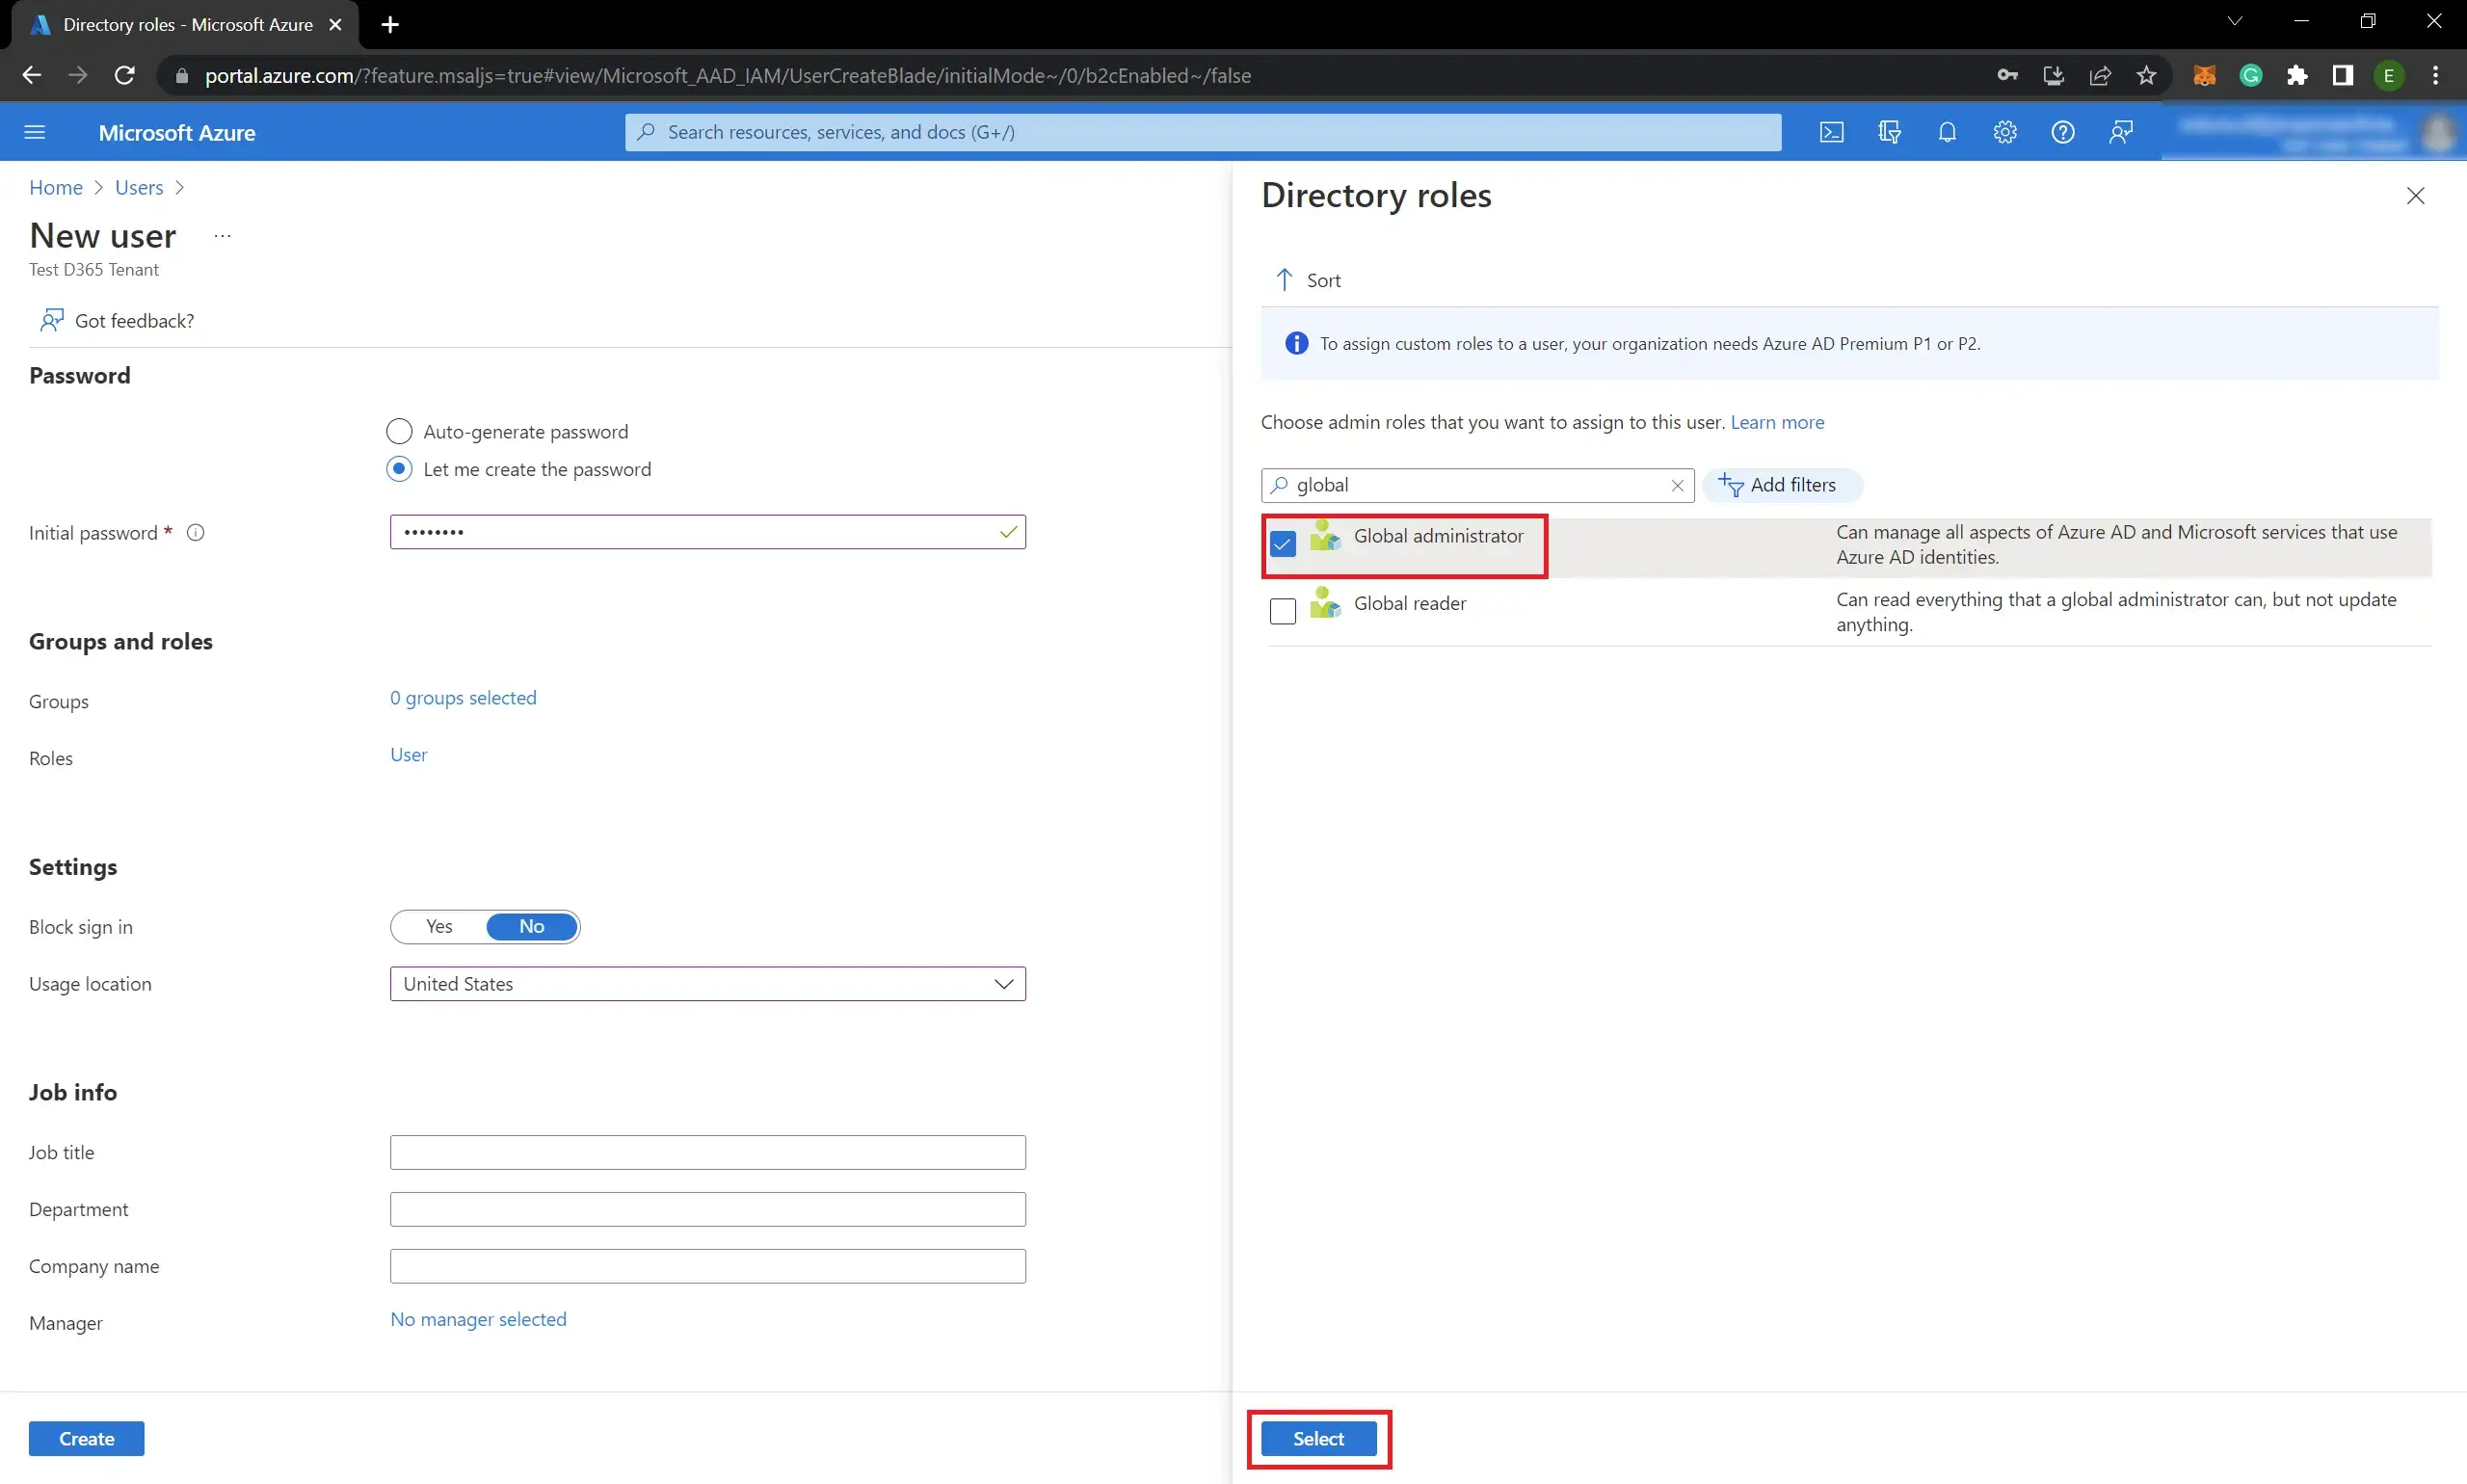
If the user account is used to install applications that are not eligible for your country and if it is only for testing purposes, It is better to select United States or another eligible country for Usage location. - Click User to assign Global administrator role to the user (This role is better for the configuration of D365 apps in the tenant:
- Tick Global administrator role and then click Select:
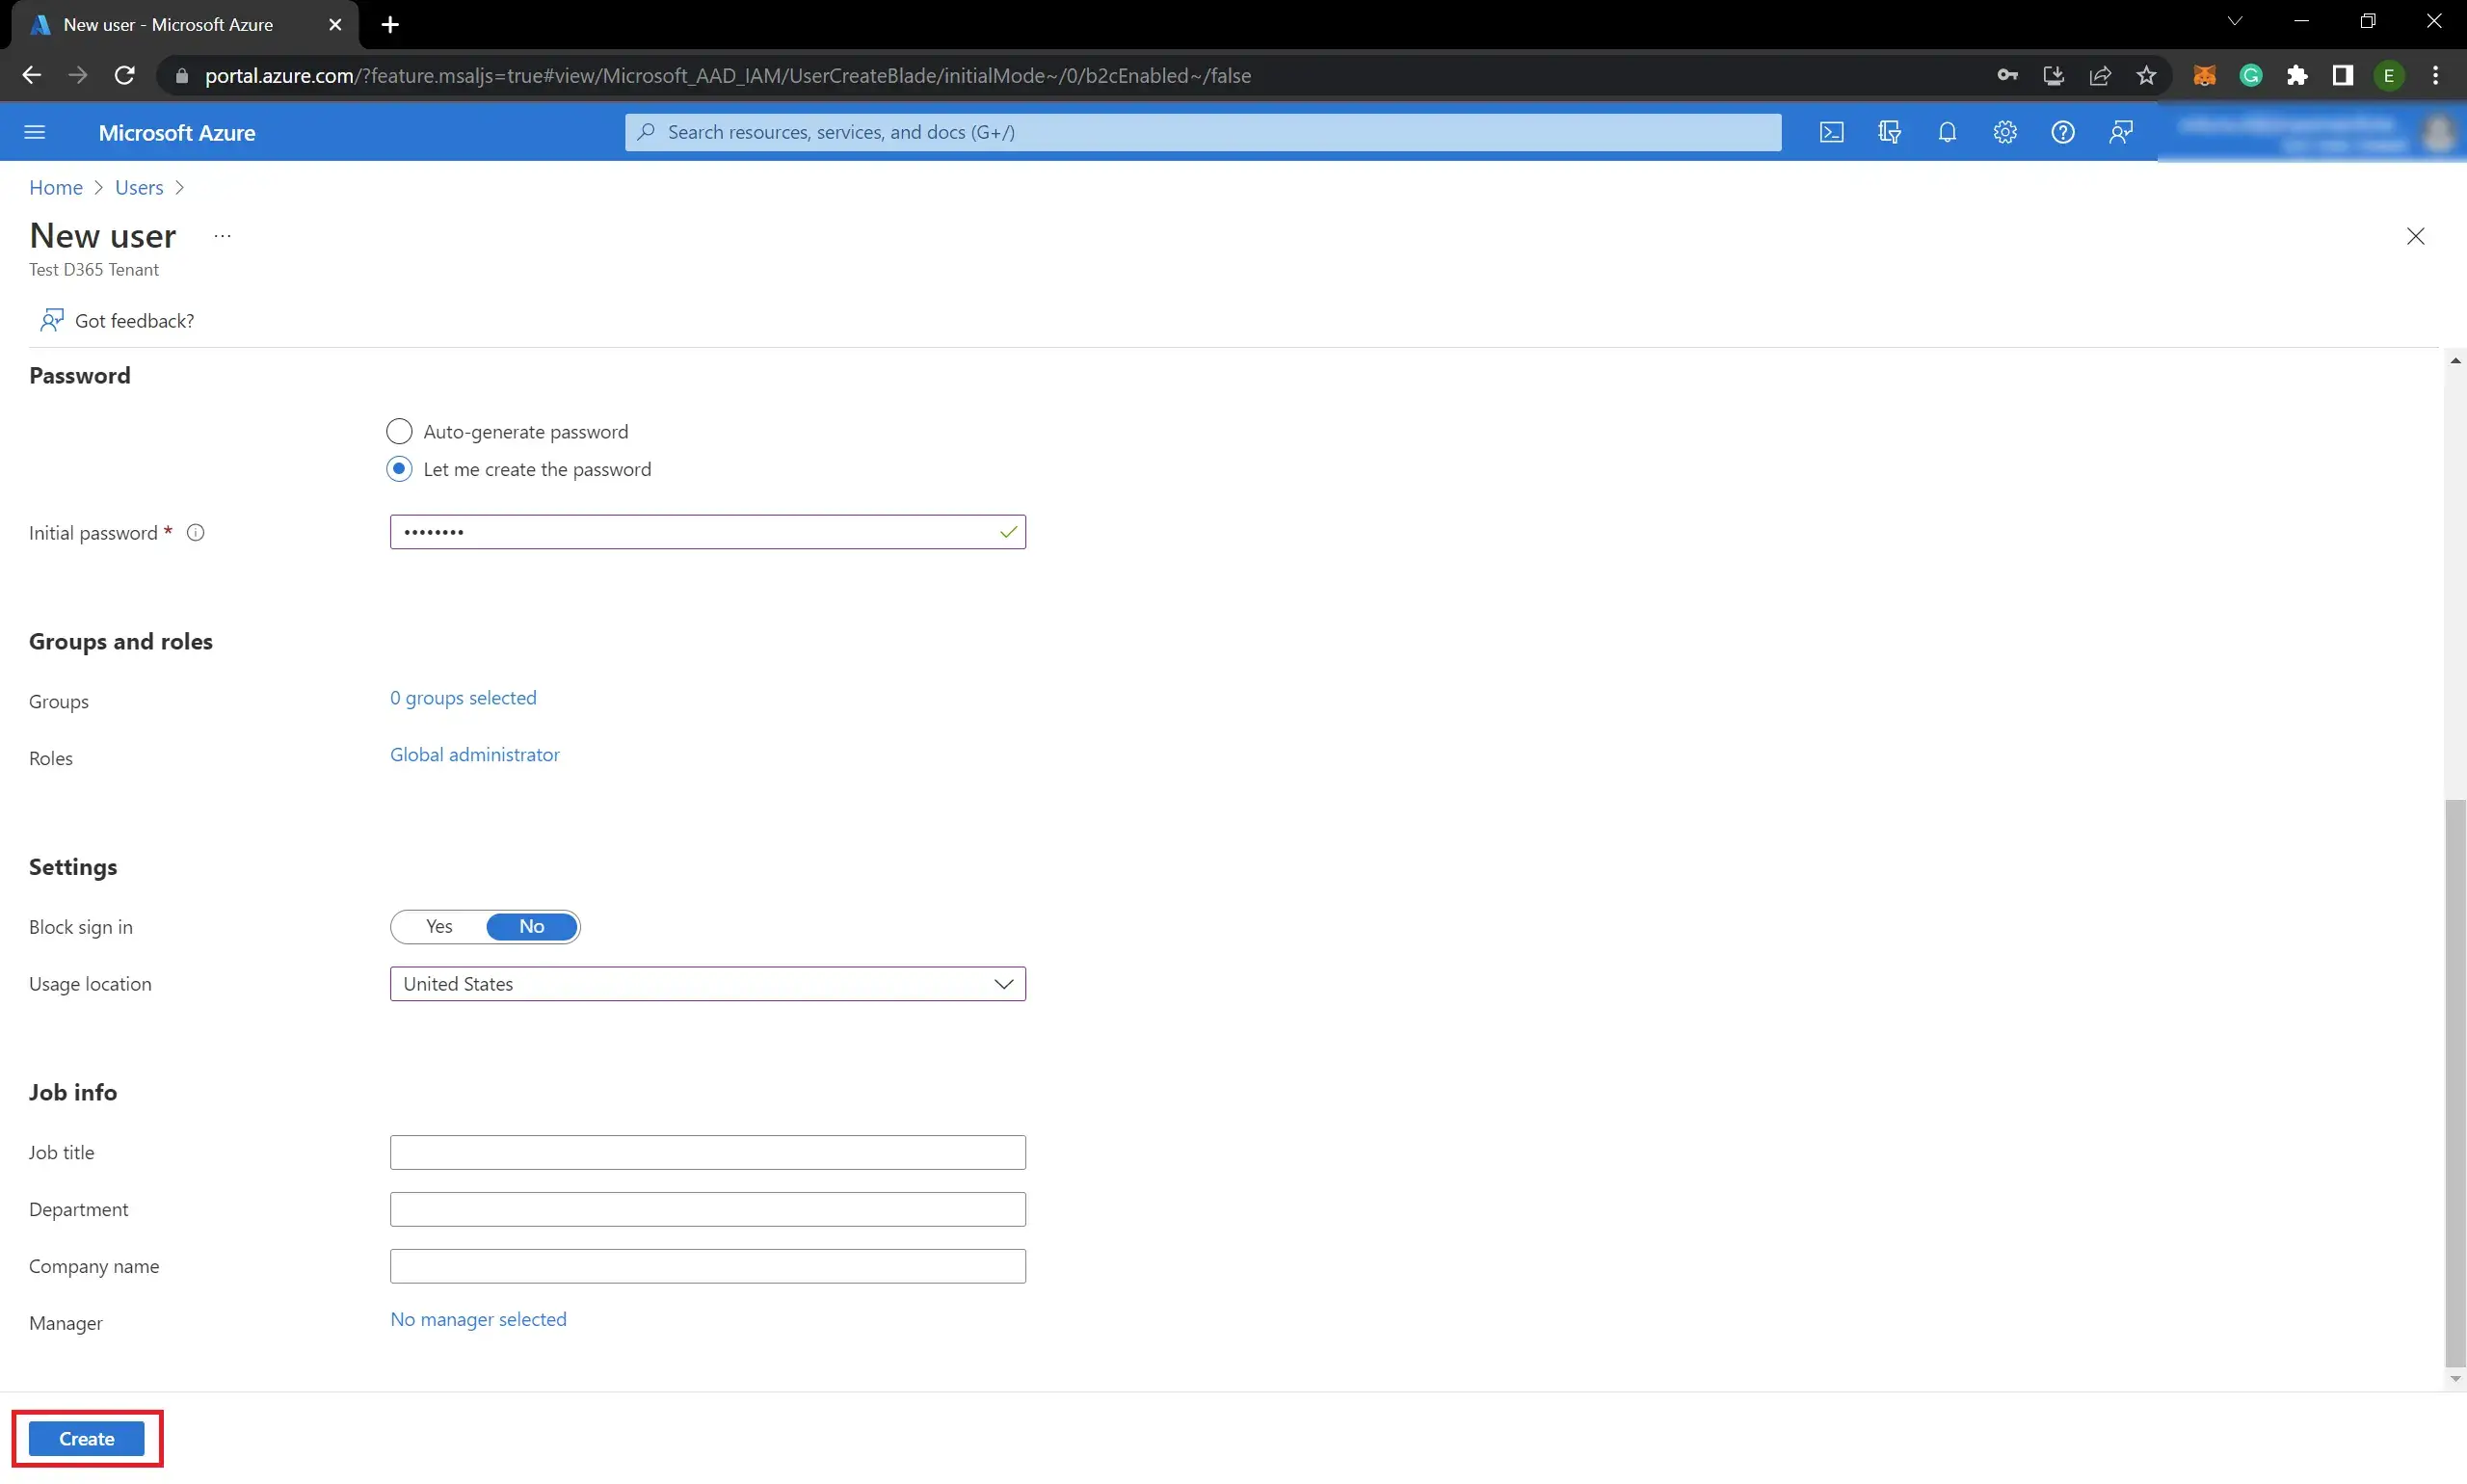
- Click Create:
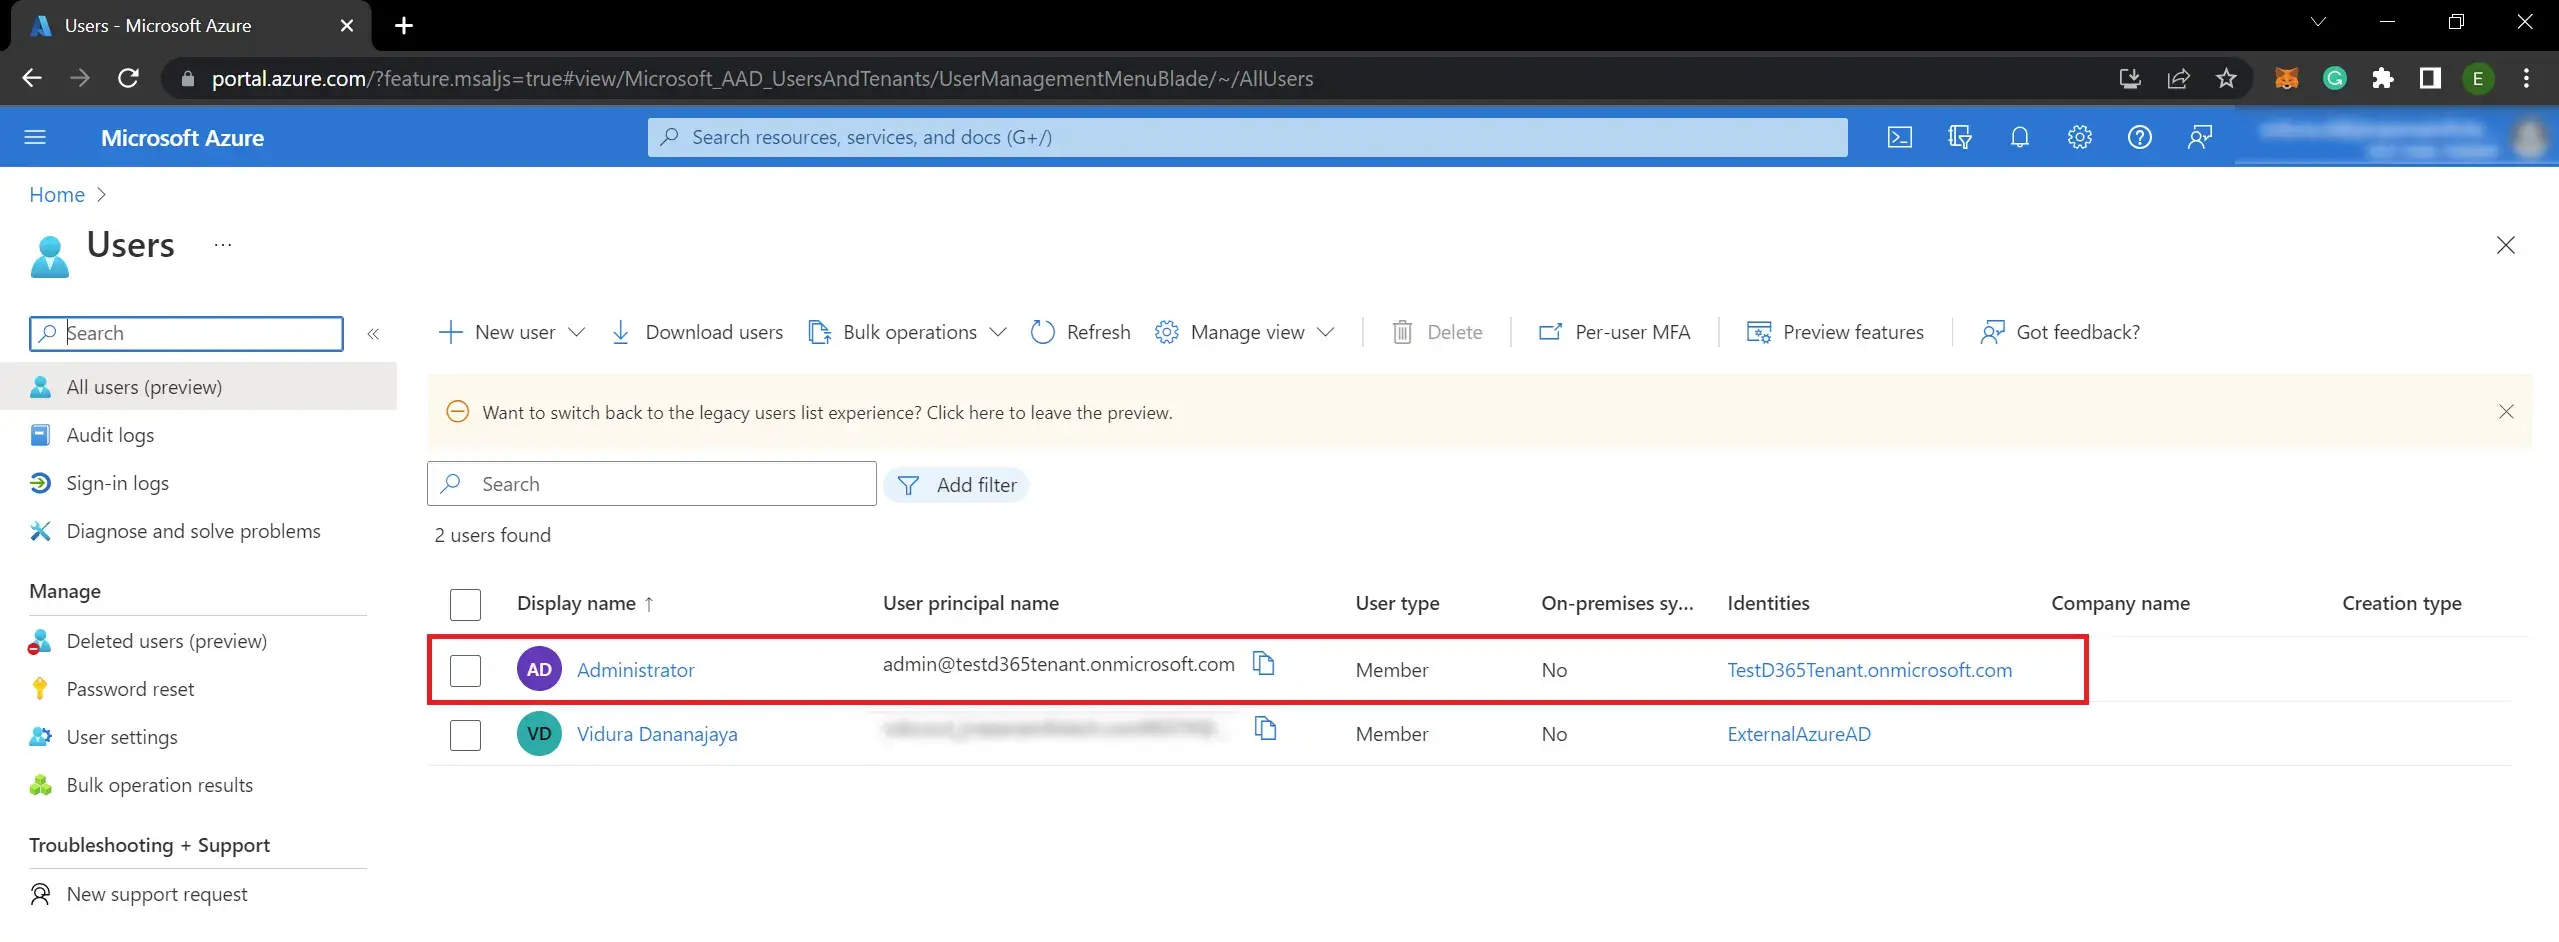
- Now you have completed adding the user:

